
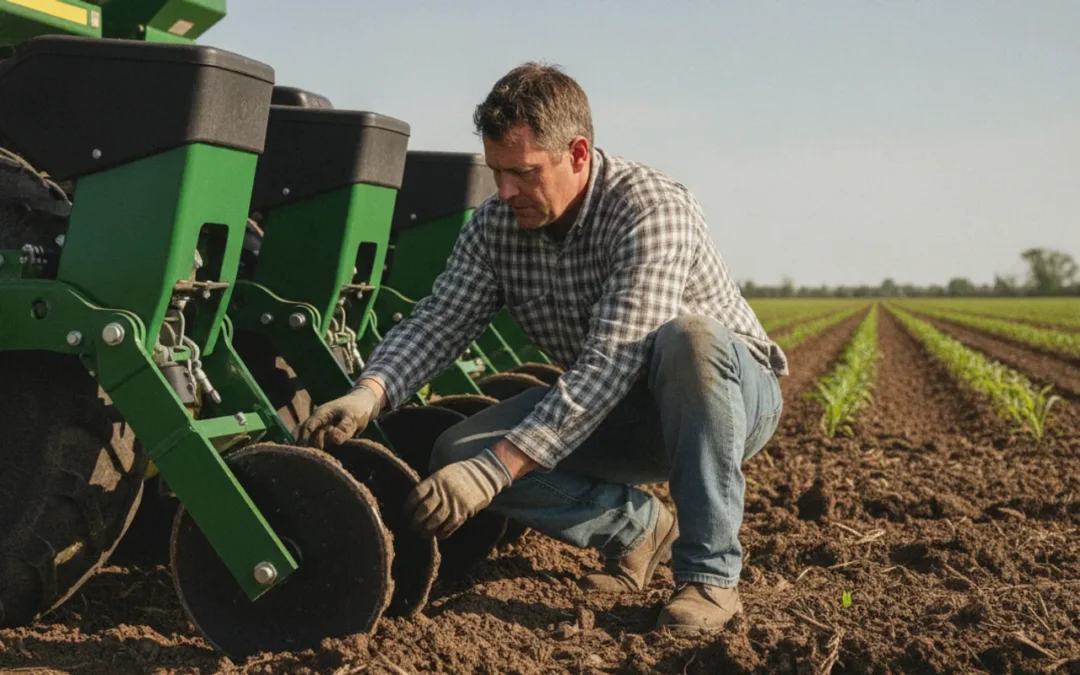
Planting speed and closing wheel adjustment work together: increasing speed may change how the row unit and closing wheels respond to soil, residue, and seed placement. There is no single speed or setting that fits every John Deere planter, field, or planting day. Use the seed trench as your guide, make one controlled adjustment at a time, and compare the result under the conditions you are actually planting.
Ask a question about closing wheel options
Why consider planting speed and closing wheel adjustment together?
Ground speed is only one part of planter performance. As speed changes, the row unit travels over the ground faster, and the closing system has less time to respond to variations in the seed trench. Depending on soil texture, moisture, residue, row-unit condition, and wheel design, the result may be a furrow that closes cleanly, a trench that remains open, or soil that is pressed more firmly than intended.
That does not mean faster planting always causes poor closure, or that slowing down always fixes it. A field with friable soil and consistent row-unit operation can behave differently from a damp, cloddy, compacted, or residue-heavy field. Even within one field, conditions can change across soil types, headlands, slopes, and previously trafficked areas.
A planter-speed study presented in the Beltwide Cotton Conferences compared planting speed and planter width and reported differences in planting efficiency and acres per hour. It is useful context for the operational trade-off, but it does not establish a universal best speed for your planter or a closing-wheel setting. Treat your own emergence and furrow checks as the deciding evidence. Read the study on planter width, speed, and planting capacity.
What should you check before changing a John Deere planter setting?
Start by identifying the planter model, row-unit configuration, closing-wheel type, and adjustment mechanism. John Deere planters and aftermarket components can differ. Use the operator manual for the specific machine to confirm how its closing-wheel pressure, linkage, or other settings are adjusted. Do not assume a lever position, spring location, or number of turns is interchangeable between models.
- Inspect the row unit. Look for loose or worn parts, damaged wheels, buildup, and anything that prevents the closing assembly from moving freely. A setting cannot compensate for a mechanical problem.
- Check the seed trench. Dig behind several row units. Note whether the trench is open, whether the seed is exposed, and whether the sidewalls look smeared or compressed.
- Look at the soil, not just the surface. A tidy surface can hide an open slot around the seed. Gently open the furrow to see whether soil is contacting the seed and whether the trench has been filled consistently.
- Compare rows and field zones. Inspect more than one row and more than one spot. Differences between row units may point to a setup or wear issue; differences by field zone may reflect changing conditions.
If you are diagnosing a John Deere machine specifically, keep the machine’s manual and the equipment configuration in view. A general overview of closing wheels for corn can help frame the soil-contact questions, but it does not replace the instructions for your planter.
Which field signs indicate a speed or adjustment issue?
Use several signs together. One imperfect furrow is not enough to diagnose a speed problem, and a particular surface appearance does not prove that seed-to-soil contact is adequate.
- Open trench behind the closing wheels: Check wheel alignment and contact, row-unit movement, and whether the soil is too wet, hard, or cloddy to crumble and close. A speed reduction can be a useful test, but first rule out a damaged or obstructed component.
- Seed visible at the surface: Carefully dig in the row and check seed depth and cover. Confirm that the furrow is not being reopened or that residue is not interfering with closure.
- Firm, smooth sidewalls: Wet soil can smear under pressure. If the trench walls are glossy or compacted, adding pressure may make the condition worse. Pause or reassess field readiness rather than forcing the wheels to press harder.
- Uneven closure across rows: Compare row units, wheel condition, and settings. If the pattern follows a particular row, inspect that unit. If it follows a soil zone or traffic lane, the cause may be field variation.
- Furrow too loose or cloddy: Consider whether the soil is dry or hard, and whether wheel type and pressure are suited to the conditions. Avoid making several changes at once because it becomes difficult to identify what helped.
Rain and drying can change the way a furrow behaves. For a separate field-check process, see what to inspect after rain. If the main concern is dense or smeared soil near the row, review the factors in this guide to sidewall compaction in a planter.
How can you run a useful speed and setting comparison?
A short, controlled test is more informative than changing the planter across the whole field based on a quick glance. Choose a representative area with reasonably consistent soil and residue. If conditions vary sharply, test each distinct zone separately rather than combining observations.
- Record the starting point. Note the planter model, closing-wheel type, current adjustment, approximate speed, soil condition, residue, and location. Record any recent maintenance or changes.
- Make a baseline pass. Plant a short distance using your current operating setup. Stop safely, inspect the furrow, and dig in multiple rows at several locations. Check closure, seed cover, and soil condition around the seed.
- Change one variable. If you suspect speed is contributing, make a modest speed change while leaving the wheel setting unchanged. If you suspect wheel pressure or another setting, change only that according to the planter manual and keep speed consistent.
- Repeat in comparable conditions. Use a nearby strip with similar soil and residue. A comparison across a wet depression and a dry hill will not isolate the effect of speed or adjustment.
- Check the result in the trench. Compare the actual seed and soil, not only the surface. Note whether the furrow closes, whether sidewalls are smeared, and whether the result is consistent between row units.
- Recheck as conditions change. A setting that works in one field condition may not remain suitable after a rain, as the soil dries, or when residue and texture change.
For repeatable observations, a simple furrow ruler can help you record furrow dimensions consistently. Keep notes with the field and conditions so you can compare results later; do not rely on memory alone.
How do speed and closing wheel adjustments compare?
Speed and adjustment are related, but they answer different questions. A lower speed can help determine whether the system behaves differently with more time over the ground. A wheel-setting change tests whether the closing force or configuration is appropriate. Neither is a substitute for checking field readiness or fixing worn parts.
| What you change or inspect | What it can help you learn | What to watch for | Good test practice |
|---|---|---|---|
| Ground speed | Whether closure or row-unit response changes as travel speed changes | Open slots, variable cover, or a result that differs by soil zone | Keep the closing-wheel setting constant and compare similar ground |
| Closing-wheel pressure or position | Whether the current configuration is closing the trench appropriately | Insufficient closure, excessive firmness, smearing, or clods | Follow the manual and change one adjustment at a time |
| Wheel condition and alignment | Whether wear, damage, buildup, or misalignment affects performance | Uneven wear, restricted movement, or differences between row units | Inspect safely with the planter stopped and secured |
| Field readiness | Whether moisture and soil structure allow a clean closing result | Plastic sidewalls, sticking soil, or hard clods | Reassess timing and conditions before adding pressure |
| Wheel design | Whether a different wheel configuration may better suit the operation | Performance that remains inconsistent after basic setup checks | Compare in a controlled strip and evaluate the seed zone |
For a broader look at how wheel designs and soil conditions can change the decision, use this practical comparison of closing wheels for strip till. The relevant choice depends on your field, tillage system, planter setup, and what the seed trench shows—not on a label or a single speed recommendation.
When should you slow down, adjust, or stop?
Consider slowing down as a diagnostic step when a representative test shows poorer closure at your current speed and the machine is otherwise operating correctly. If the result improves at a lower speed, record the conditions and verify the change in more than one comparable section. Do not treat the test as proof that every field requires the same speed.
Consider a closing-wheel adjustment when inspection points to a setting issue and the manual confirms how to make the change. Use small, deliberate changes. Too little closing action can leave a trench or inadequate cover; too much force in wet or plastic soil can compact or smear the furrow. The goal is a closed seed trench with suitable soil contact, not the firmest possible surface.
Pause planting when soil is sticking, the furrow sidewalls smear, or the planter cannot produce an acceptable seed environment despite a sound setup. Trying to solve unsuitable field conditions with more closing pressure may leave a problem that is harder to correct later. Field readiness decisions should account for the crop, forecast, soil, and operation—not a universal threshold.
How should you choose or evaluate replacement closing wheels?
Before replacing wheels, separate adjustment and maintenance questions from a design question. Confirm the closing assembly is in good condition, adjusted according to the planter instructions, and tested at a suitable speed in representative conditions. If the furrow still does not meet your needs, compare potential replacement options for fit, installation, durability, and performance in your tillage and soil conditions.
Farm Shop MFG’s Germinator closing wheels are one option to review. The company describes its product as a steel closing-wheel design. Check the product information for current compatibility and configuration details before ordering. Farmers who want to compare the available equipment can also browse Farm Shop MFG products and the closing wheel category.
For equipment questions specific to your planter or configuration, review Farm Shop MFG resources or contact the company with your model, row-unit details, and the field conditions you are trying to address. A useful conversation starts with what you observed in the trench, not only the speed shown on the monitor.
Review Germinator closing wheel details
How can you interpret results across different field conditions?
A speed or closing-wheel comparison is only useful when you know what changed between passes. Soil moisture, texture, residue, planting depth, row-unit movement, and previous traffic can all affect what you see. If one pass crosses a wet swale and the other crosses a dry rise, it is difficult to attribute different closure to speed. Mark the test area, note its limits, and compare nearby strips that appear similar. When the field is variable, run separate checks in the major zones instead of averaging unlike conditions into one conclusion.
Use a repeatable observation routine. At each stop, inspect several rows and a few spots along each pass. Record the condition at the seed, not merely whether the wheel tracks look neat. Is the trench filled? Is the seed covered at the intended depth? Does the soil around it crumble or smear when opened? Are there clods or residue preventing soil from contacting the seed? Look for a pattern: a problem on every row, one row unit, one side of the planter, or a specific patch of the field calls for different follow-up checks.
Keep operating speed observations separate from monitor readings that describe other planter functions. A speed display tells you how quickly the machine is moving; it does not by itself prove that the seed trench is closed or that seed placement is consistent. Likewise, a surface that looks smooth is not enough to verify what is happening below ground. Digging carefully behind the planter remains a practical way to check cover, depth, and the condition of the seed zone. Follow all normal safety steps before inspecting or working around equipment.
Also separate immediate furrow appearance from later crop response. During planting, you can judge whether the trench is covered and whether the surrounding soil appears excessively smeared or cloddy. Emergence observations later can add context, but they are influenced by more than closing wheels, including planting depth, seed quality, moisture, temperature, and other field conditions. Record where and when you see uneven emergence and compare it with the planting notes. Avoid attributing a crop stand difference to a single adjustment without checking the other plausible causes.
A practical record can be brief. Note date, field zone, crop, approximate speed, machine configuration, closing-wheel type and setting, soil moisture description, residue, and what you found when you opened the furrow. Add the exact change made and whether the next comparable pass improved, worsened, or did not change the result. Photos can help you remember the location and appearance, but pair them with written notes on the seed trench. This record gives you a better starting point the next time conditions are similar and can help distinguish a recurring setup issue from a one-day field condition.
If the test results remain inconsistent, return to basic checks rather than stacking additional changes. Verify the machine’s adjustment instructions, inspect wear and free movement, and consider whether different soil zones need different operating decisions. If the same issue occurs across several comparable areas with sound equipment, a different wheel configuration may be worth evaluating in a controlled comparison. Keep the goal practical: consistent seed placement and a properly closed trench under conditions where planting is appropriate.
What is the practical next step?
Begin with a safe inspection and a baseline furrow check. Record your speed and closing-wheel setting, test one change at a time in comparable ground, and judge the result by seed cover and soil condition around the seed. Use the correct John Deere operator manual for machine-specific adjustments, and reassess as field conditions change. This process helps you distinguish a speed effect from a setting, wear, or field-readiness problem before you change the whole planter setup.