
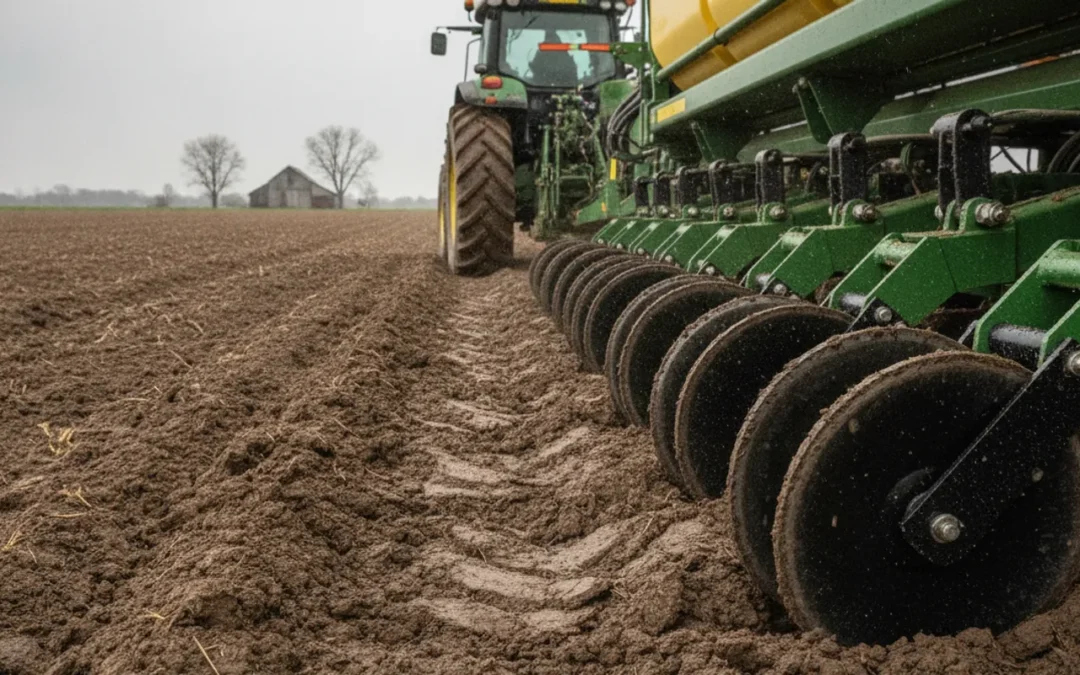
Closing wheel performance after rain depends on more than whether the surface looks dry. Soil moisture, texture, residue, wheel pressure, and furrow condition all affect how the wheels close the seed trench. A deliberate check before resuming planting can help you avoid smearing wet soil or leaving a trench open.
Ask about planter closing wheel fit
What changes after rain?
Rain can soften the surface while leaving deeper soil wet. That difference matters: closing wheels may encounter sticky soil at depth even when the top looks workable. In wet conditions, soil can smear or compact rather than crumble around the seed. In drier, friable conditions, the same wheel setup may close the trench cleanly.
There is no single rainfall amount or waiting period that determines when a field is ready. Soil type, drainage, residue cover, slope, and the intensity and duration of rain all change drying time. Check representative areas rather than deciding from the field edge. Low spots and heavier ground may need more time than well-drained sections.
Closing wheels are only one part of the result. Opener condition, row-unit downforce, planting depth, speed, and soil conditions influence the seed trench too. If emergence or closure looks poor, diagnose the complete row-unit system. For background, review the guide to closing wheels for corn and Germinator wheel information.
How can you check whether the field is ready?
Before planting resumes, inspect soil at the depth the planter will work. A surface that has dried can conceal a wet layer that will smear under the opener or closing wheels. Dig small test holes in representative areas, including heavier or lower ground. Examine whether the soil crumbles, sticks, or forms a slick ribbon when handled.
- Check several field zones. Include a typical area and locations that hold water or have different soil texture.
- Look at working depth. Assess the soil where the opener and closing wheels interact, not just the surface crust.
- Make a short test pass. Stop and uncover several seed trenches before committing to a full field pass.
- Recheck as conditions change. A field can vary from end to end, and moisture can shift during the day.
Use the test pass to inspect the actual trench. Is it closed over the seed, or does a slot remain? Are the walls smeared and glossy? Is soil pressed into a dense band? Is the seed at the intended depth and surrounded by soil? These observations are more useful than judging performance from wheel marks alone.
What should a post-rain furrow inspection show?
Carefully uncover several planted seeds without pulling them through the soil. Check that each seed is at the bottom of the furrow, has contact with moist soil, and is covered. Then inspect the surrounding soil. A clean closure usually leaves soil settled around the seed without a persistent open slot or obvious compacted sidewall. Interpret what you see in context: texture and moisture affect the appearance.
| What you observe | Possible meaning | Practical next check |
|---|---|---|
| Open slot over or beside seed | Soil may not flow back into trench; conditions or setup may not suit closure | Check moisture at depth, alignment, and another test pass |
| Shiny, smeared trench walls | Soil may be too wet or worked while plastic | Pause in that area and reassess after drying |
| Firm, compacted soil over row | Closing force or soil condition may be pressing rather than crumbling soil | Evaluate downforce and wheel action in a controlled test |
| Seed exposed or inconsistent depth | Closure, opener setup, or row-unit movement may need attention | Inspect opener, depth setting, and wheel alignment |
| Consistent placement and closed trench | The tested combination appears to be working in that zone | Keep checking as field conditions vary |
These are diagnostic clues, not a substitute for planter guidance and seed placement requirements. For a way to examine the furrow, see the Furrow Ruler information. Consider whether bearing drag, worn parts, or alignment affect rotation; see standard closing wheel bearing details.
How should you adjust closing wheels in wet soil?
A wheel adjustment cannot make an unworkable field ready. First determine whether soil at planting depth is fit to work. If it sticks and smears, waiting for suitable conditions is often more useful than increasing pressure to force closure. Working wet soil can leave compaction or a poor seed environment that persists after the surface dries.
When soil is workable but closure is inconsistent, change one setting at a time and inspect the result. Avoid changing several settings together; otherwise it becomes hard to tell what helped. Follow the planter manufacturer’s setup guidance. Confirm wheels are centered around the row, turn freely, and contact soil as intended.
- Start with a short test pass and inspect multiple rows.
- Change pressure in a small, controlled step when setup—not excessive wetness—is the likely issue.
- Check whether the trench closes without crushing or displacing seed.
- Reinspect in wetter and drier zones before settling on a field-wide setting.
- Record conditions and settings so you can compare results on the next pass.
A University of Wisconsin-Madison Extension publication reports that closing wheel type and downforce affected corn emergence in no-till conditions. It does not establish a universal setting for every planter or wet field; it supports checking the interaction between setup and conditions. Read the Wisconsin Extension publication on closing wheel effects. A separate study examined how wheel type and row-unit downforce can affect corn germination in no-tillage systems; review the journal study.
How do wheel types compare after rain?
Wheel shape, material, and action can change how soil is moved back toward the seed trench. But no design can overcome soil that is too wet to work properly. Compare options under the same field conditions and evaluate the furrow, not just appearance or performance claims.
| Comparison point | Questions to ask | Why it matters after rain |
|---|---|---|
| Soil interaction | Does the wheel crumble and close soil, or smear and press it? | Wet soil can behave differently under pressure than friable soil |
| Fit and alignment | Does the assembly match the row unit and track the trench? | Misalignment can leave uneven closure regardless of moisture |
| Adjustment | Can pressure be set and tested according to planter guidance? | Conditions may differ across field zones |
| Maintenance | Are bearings, hardware, and wheel surfaces serviceable? | Dragging or damaged components complicate diagnosis |
| Evidence | Are comparisons based on seed placement and emergence in your field? | Local observations help separate equipment effects from weather and soil variation |
Farm Shop MFG describes its Germinator closing wheels as farmer-designed equipment made with steel construction. Product and row-unit fit information are on the Germinator product page. Compare fit with your planter specifications before ordering; the planter brand alone may not establish compatibility.
How can you separate wheel problems from other causes?
Rain can expose issues that were present before the weather changed. A worn opener can affect trench shape. Incorrect depth or row-unit downforce can influence seed placement and soil flow. Residue can interfere with contact. A damaged or stiff bearing can prevent a wheel from turning as it should. Check these possibilities before concluding that wheel design is the cause.
Walk the planter with the machine safely parked and follow its service instructions. Inspect each row for loose hardware, visible wear, and free wheel rotation. Compare problem rows with rows that close well. If the issue follows one row, a component or setup difference may be involved; if it occurs across a wet zone, soil conditions may be the stronger factor. Review the closing wheel buyer’s guide and the Farm Shop MFG resources.
What should you record during the field check?
Brief notes help turn a test pass into a repeatable decision. Record the field area, recent rain conditions as you know them, soil texture, surface and subsurface moisture observations, planter speed, relevant row-unit settings, and what the seed trench looked like. Note whether the result changed between low ground and better-drained ground.
These records help avoid treating every closure problem as a hardware problem. They also give you a basis for comparing wheel setups across conditions. When you change a setting, record it and inspect again. Do not rely on a single row or a single point in the field.
How can you run a useful test pass?
A short, repeatable test is more informative than changing settings while the planter continues across a large area. Choose a representative section with reasonably consistent soil, then mark the settings before you start. Include enough rows to see whether the result is isolated to one row or repeated across the planter. Keep the planting conditions as steady as practical while you evaluate the furrow.
After the pass, stop safely and uncover several seeds from more than one row. Record the location and the row-unit settings, then compare seed depth, cover, trench shape, and evidence of smearing. If closure is acceptable in the representative zone, check another zone before assuming the setting suits the whole field. If it is not acceptable, first decide whether soil behavior indicates wetness or whether a mechanical or setup difference is more likely.
For a controlled adjustment, change one variable, such as closing pressure, by a modest amount that remains within the planter manufacturer’s instructions. Repeat the same inspection. If the change improves one zone but worsens another, do not immediately choose a compromise setting without considering whether zones should be managed separately or planting should pause in the wettest ground. The purpose is to isolate cause, not to force a single setting to conceal different field conditions.
What does a simple field comparison look like?
Suppose the upper part of a field passes a depth check and produces a closed trench, while the low end leaves a shiny sidewall and an open slot. Do not assume that one wheel setting failed everywhere. Compare soil from both areas at working depth, then inspect the transition between them. If the row unit and its settings are unchanged but the furrow changes with the wet pocket, moisture is a useful lead. A reasonable next step is to pause in that zone and repeat the check after conditions change.
Now consider a different pattern: one row leaves an open slot through both the drier and wetter sections, while neighboring rows close consistently. That pattern makes a row-specific check worthwhile. With the planter parked safely, compare alignment, wheel rotation, bearings, hardware, opener wear, and settings on the affected row with a neighboring row. The pattern does not prove a part is faulty, but it helps focus inspection rather than prompting a field-wide adjustment.
A third case is uniform smearing across many rows after a shower, even though the upper surface appears dry. In this case, look below the surface before changing wheel pressure. A shared setup change may not help if every row is encountering wet soil at depth. These comparisons keep the diagnosis grounded in where the symptom occurs and what the seed trench shows.
What field patterns can help diagnose the cause?
Look for where the problem begins and how it follows the field. A pattern tied to a low area, headland, or heavier soil points toward a condition difference worth checking at depth. A pattern that follows the same row across several soil zones makes a row-specific issue more plausible. Neither pattern proves a cause, but both help direct the next inspection.
- Across a wet pocket: compare soil at planting depth and inspect the trench on both sides of the boundary.
- On one or two rows: compare wheel rotation, alignment, hardware, opener condition, and settings with neighboring rows.
- Across the whole planter: review common settings, speed, and whether field conditions changed since the last good pass.
- Only where residue is heavier: check whether residue is interfering with soil contact or furrow flow.
Use these patterns to decide what to inspect next, not to declare that one component is at fault. When the problem crosses several field conditions and rows, the row-unit setup deserves a broader review. When it tracks soil moisture or terrain closely, waiting for the wet section to become workable may be the practical choice.
When should you pause planting?
Pause in an area when soil at working depth smears, sticks heavily, or forms a compacted sidewall during a test pass. A wheel setting is not a substitute for workable soil. Continuing through a wet pocket can create a poor furrow that later drying does not undo. A separate check may show that higher ground is ready while low ground is not; avoid treating the field as uniform when observations show otherwise.
Before resuming in the problem area, repeat the depth check and test pass. If the soil crumbles rather than smears and the trench closes without a persistent slot or dense band, continue monitoring as you plant. Weather and soil conditions can change during the day, so a decision made for one field zone or time may not hold everywhere.
What is a practical post-rain checklist?
Use a consistent sequence so that a rushed return to planting does not skip the most useful observations. The checks below move from field readiness to equipment and then to a decision. Follow the planter maker’s safety and setup instructions during every inspection.
- Choose representative places. Include typical ground and at least one area that drains slowly or has a different texture.
- Check beneath the surface. Examine soil near operating depth for crumbling, sticking, or smearing.
- Inspect the stationary planter. Look for damage, binding, wear, loose hardware, and alignment differences among rows.
- Plant a short test. Keep the existing settings for the first pass so the field result has a baseline.
- Uncover and compare. Check multiple seeds and rows for placement, cover, trench walls, and a persistent slot.
- Change one factor only if warranted. Stay within manufacturer guidance and repeat the same test.
- Make a zone-specific choice. Continue where the test is satisfactory; pause and reassess where soil remains plastic or closure is poor.
Keeping the baseline setting until after the first sample is important. If you change pressure, speed, and depth at once, a better-looking trench does not reveal which change mattered. A simple note such as “north rise, existing setting, trench closed, no sheen” gives you a practical comparison for the next area. A note that records only “looked okay” is harder to use when the field changes.
Review Germinator wheel fit and details
Frequently asked questions about closing wheel performance after rain
How long should I wait after rain before planting?
There is no fixed waiting time that fits every field. Check moisture and soil behavior at intended planting depth in representative zones, then make and inspect a short test pass. If soil smears or sticks heavily, wait for it to become workable rather than forcing the pass.
Can more closing wheel pressure fix an open trench?
Not always. If soil is too wet, additional pressure may press or smear it instead of closing the trench well. Check moisture, wheel alignment, row-unit setup, and opener condition. Test a small adjustment only when conditions are workable.
Why does the trench look different across one field?
Soil texture, drainage, residue, and moisture can vary over short distances. A setting that closes the trench in one zone may produce a different result in another. Inspect more than one representative area and adjust cautiously.
Should I blame the closing wheels if emergence is uneven?
No. Emergence can be influenced by seed placement, depth, opener condition, soil moisture, compaction, and other planting conditions as well as closing wheel action. Inspect seed and furrow, compare rows, and assess the whole row unit before identifying a cause.
After rain, the most useful decision comes from checking soil at depth, testing a short pass, and inspecting actual seed placement before continuing across the field.