
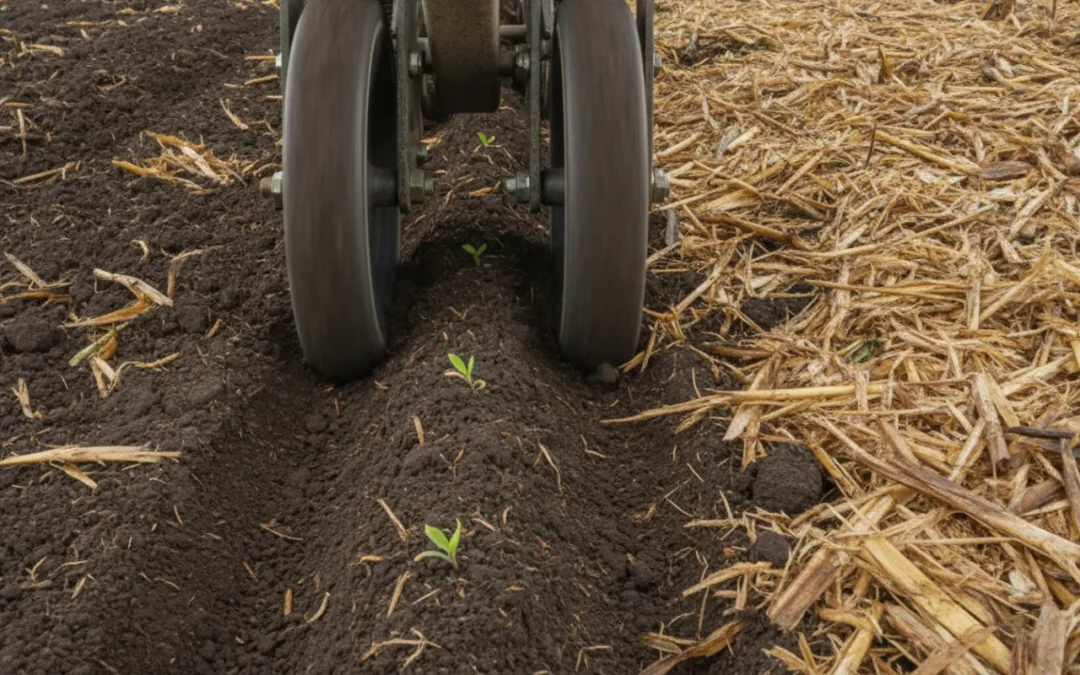
Choosing closing wheels for strip till means balancing firm seed-to-soil contact with a closed furrow, while preserving the advantages of a prepared strip and managing residue between rows. Soil texture, moisture, row-unit setup, and the condition of the seed trench all affect what a closing wheel can do. A wheel that performs well in one field may not be the right choice in another. Use a controlled comparison in your own conditions, then match the wheel and adjustment to the result you need.
Ask about closing wheel options
What does strip till ask of a closing wheel?
Strip till creates a tilled zone for planting while leaving much of the soil surface and residue undisturbed between rows. The closing wheel works in that prepared row, not across the whole field. Its job is to help close the seed trench and establish suitable soil contact around the seed without creating a poor surface condition.
Conditions vary within the same field. A strip may be mellow and dry in one area, damp or cloddy in another, and compacted where equipment traffic crossed it. Residue can also collect differently along the row. These changes make a single visual impression unreliable. Check multiple representative areas and look below the surface as well as at the row top.
Strip till is not one fixed tillage recipe. The University of Wisconsin Extension discussion of strip-tillage field studies describes strip tillage as combining features of tillage and no-till. That context matters: compare wheels against the conditions of your system, rather than assuming a conventional full-width tilled seedbed.
Which performance factors should you compare?
Furrow closure and seed contact
Start by checking whether the trench is closed over the seed and whether soil is in contact with it. Carefully expose several seeds from the row without pulling them out of position. Look for a continuous seed trench, seed placement, and whether the soil around the seed is pressed into contact or left loose. Do not judge solely by the appearance of the row surface: a smooth top can conceal a gap or an open slot below.
Compare the same row-unit settings and planting conditions when possible. If one setup leaves an open trench while another closes it, note the moisture and soil texture in that area. A difference may come from wheel design, but it can also reflect pressure, alignment, depth, speed, or a change in field conditions. Write down observations immediately, before the visual details blur together.
Soil movement, clods, and sidewall condition
Observe how much soil is moved inward and how the furrow walls look. In damp soil, excessive pressure or soil smearing may leave a compacted or slick surface. In dry, cloddy soil, a wheel may leave large clods or fail to move enough soil over the trench. Look at both sides of the row and compare more than one spot.
Note whether the closing action leaves the seed at the intended depth. If the wheel pushes soil over the row unevenly or shifts the row surface, inspect the planter setup as well as the wheel itself. There is no single surface pattern that proves a wheel is right or wrong across every strip-till field. A low ridge, for example, should be considered alongside trench closure and seed position, not treated as a verdict on its own.
Residue flow and consistency across rows
Check for residue hairpinning or residue trapped in the seed trench. Also look for residue bunching at the closing wheels and differences from one planter row to another. Strip till often leaves residue in the inter-row area, so residue handling in the row matters more than a general count of how much residue remains on the field.
Walk several rows after planting. If the same row units repeatedly leave a different finish, inspect for wear, bearing drag, alignment, and row-unit variation. For additional context on planter sidewall compaction and its causes, compare field evidence before attributing a symptom to wheel choice alone.
What the field pattern can tell you
Map where a problem appears before changing parts. A defect repeated on one row unit may point toward that unit’s alignment, hardware, or condition. A defect that begins across many rows in a wetter section may instead track a change in soil moisture or texture. A problem that follows a wheel configuration across neighboring rows deserves a closer wheel comparison, but still warrants checking that both configurations were adjusted consistently.
Use a simple note for each observation: location, row number, soil condition, residue condition, wheel setup, and what the exposed seed trench showed. This turns a vague report such as “the row looks rough” into a testable description. If possible, take a photo from above and another of the exposed trench, with the location and setup recorded separately.
How do common closing wheel options compare?
The table is a field-check framework, not a universal ranking. Wheel construction and contact patterns vary by product, and results depend on soil, moisture, residue, planter geometry, and adjustment. Verify fit for your row unit and assess performance under conditions representative of your farm.
| Comparison point | What to observe | Why it matters in strip till | Useful check |
|---|---|---|---|
| Furrow closure | Open slots, loose soil, or an unevenly covered trench | The prepared strip can vary in tilth and moisture | Expose seeds at several points and inspect the trench |
| Soil firmness | Firm contact, excessive packing, or a slick sidewall | Wet and dry portions of a strip may respond differently | Compare row surface and soil around the seed, not appearance alone |
| Residue handling | Residue in the trench, hairpinning, or bunching | Residue can be unevenly distributed around planted rows | Inspect several rows and note where residue is caught |
| Adjustment sensitivity | How results change with pressure and row-unit setup | One setting may not suit all field conditions | Change one variable at a time in a marked test area |
| Wear and service | Wheel damage, bearing drag, loose hardware, or uneven wear | Mechanical variation can look like a design problem | Inspect components before comparing field outcomes |
Traditional rubber, cast, and other aftermarket closing wheels should be compared on the same basis: fit, furrow closure, soil movement, residue response, wear, and service needs. Product material by itself does not establish field performance. If considering a particular option, review its specifications and installation requirements. Farm Shop MFG provides information about its Germinator closing wheels and its Germinator product line; use those details to check compatibility and construction, then validate operation in the field.
Compare the whole outcome, not one attractive row
A useful comparison asks whether a wheel performs acceptably across the range of conditions you actually plant in. One option may close a trench neatly in a friable strip but leave a different result in a heavier or wetter area. Another may move soil more aggressively but require an adjustment that is less forgiving as moisture changes. Neither observation establishes a universal winner. It helps identify the tradeoff you need to manage.
Separate the questions. First, does the configuration fit and operate freely? Second, can you achieve closure and seed contact? Third, does the result remain consistent as conditions change? Fourth, does the performance justify the cost, maintenance, and adjustment effort for your operation? Keeping those questions distinct prevents a sales claim or a single field snapshot from replacing your own evidence.
How can you run a fair field comparison?
- Choose a representative area. Pick a strip with typical soil, moisture, residue, and planting conditions. Avoid comparing a dry rise with a wet depression and treating the result as a wheel difference. If the field has distinct soil zones, plan a separate comparison in each zone rather than averaging them together.
- Check the planter first. Look for worn parts, bearing drag, loose hardware, alignment differences, and row-unit issues. Confirm that the planter is operating consistently before making a product comparison. A wheel that does not rotate freely or sits differently from its counterpart makes the test hard to interpret.
- Record the starting setup. Note the wheel type, row unit, pressure setting, planting depth, speed, and field conditions. Use the same planter settings across the test unless the test is specifically about adjustment. Include the date and whether the strip was recently worked, dried, or rained on.
- Mark test rows or passes. Keep the compared sections easy to identify. If practical, compare adjacent rows or short passes under nearly the same conditions, and avoid changing multiple factors at once. Label each setup so the person checking the furrows knows which configuration made which pass.
- Inspect the furrow immediately. Check closure, soil contact, residue, sidewalls, and seed position at several points. Record what you see rather than relying on memory or one attractive section of row. Expose seeds carefully and return to the same depth when comparing samples.
- Recheck after conditions change. A wheel that works in friable soil may behave differently after rain or as the strip dries. Repeat checks when moisture or soil condition shifts, and make adjustments gradually. Do not confuse changing soil with a change in hardware.
- Keep the observations together. Take notes or photos with date, field location, and setup information. This helps distinguish a repeated pattern from a one-time change in soil or operator settings. Summarize what was consistent and what varied, rather than recording only the preferred result.
Use the furrow ruler information as one resource when evaluating furrow dimensions, but pair measurements with seed exposure and soil-contact checks. A measurement cannot by itself tell you whether the seed trench is properly closed or whether the surrounding soil condition is suitable.
A practical example: two settings in one field
Suppose one section has a dry, crumbly strip and another is damp after a shower. In the dry section, setup A leaves a visible slot in two of the inspected rows, while setup B covers the trench but leaves clods near the row. In the damp section, setup A closes the furrow with a smooth surface, while setup B leaves a slick-looking mark. The right conclusion is not that one setup always wins. The useful finding is that performance changes with soil condition and that both settings need to be evaluated for the conditions where they will be used.
Repeat the comparison in several spots within each condition. If the same pattern appears repeatedly, test a modest pressure adjustment while keeping the wheel configuration constant. Then inspect again. If the result changes, you have evidence about adjustment sensitivity; if it does not, check alignment, opener condition, and whether the test area was truly comparable. This stepwise approach makes a field trial more useful than switching wheels and pressure at the same time.
What changes after rain or as the strip dries?
Rain can change the condition of the tilled strip and the response of soil to closing pressure. Wet soil may smear or compact under pressure; as it dries, the same setting may leave a different finish. A rain delay can also create uneven conditions across fields, especially where drainage, residue, and soil texture differ.
When planting resumes, avoid assuming the old setting is still correct. Dig in the row, inspect the furrow wall and seed contact, then check several locations. If the surface looks closed but the trench below remains open, or if soil is smeared, treat that as a prompt to inspect pressure and operating conditions. Make one adjustment at a time and recheck. See this guide to closing wheels for corn for broader planter-wheel selection context, while keeping your strip-till field conditions central to the decision.
Do not use a single pass in wet soil to conclude that a wheel is unsuitable in all strip-till conditions. Record the state of the field and revisit the comparison in more typical planting conditions. The aim is consistent closure and suitable seed contact, not a particular appearance at any cost.
Use a reset check when planting resumes
After a rain delay, begin with a short check rather than assuming yesterday’s observations still apply. Inspect an area at the start of the pass and another after conditions or terrain change. Look for the same signs: an open slot beneath the surface, exposed seed, residue in the trench, smeared soil, clods, and differences between row units. If results vary within a short distance, pause before making a broad adjustment; the variation may follow the field rather than the equipment.
When soil is tacky, avoid treating a glossy furrow wall as proof that more closing pressure is needed. More pressure can worsen smearing in some conditions. Conversely, dry, loose soil may need a different response than wet soil. Make only a controlled change, then inspect a fresh section. Keep the first section as a reference so the comparison is not based on memory.
What should you check before replacing wheels?
- Compatibility: Confirm the option fits your planter row unit and required hardware. The Germinator N6 product details are available for review where relevant; verify your own planter configuration before ordering.
- Condition: Inspect the existing wheels, bearings, axles, and mounting points. A dragging bearing or damaged component can affect field results. The standard bearing information may help when checking service parts.
- Adjustment: Confirm settings and make sure left and right sides are operating as intended. Inconsistent setup can distort comparisons.
- Field evidence: Identify a repeatable problem, such as incomplete closure in representative conditions, rather than replacing parts based on one isolated spot.
- Support: If compatibility or setup is unclear, use the Farm Shop MFG resource library or contact the manufacturer with your planter details and field observations.
Wheel selection is only one part of planting performance. Planting depth, opener condition, row-unit downforce, speed, and soil moisture all contribute to what you see. Check those factors before concluding that a different closing wheel will solve every emergence or furrow problem. A field symptom may have more than one cause, and replacing a wheel without checking the rest of the system can leave the underlying issue untouched.
Questions to answer before ordering
Write down the planter make and model, row-unit configuration, current wheel arrangement, and any relevant mounting or hardware details. Record the symptom precisely: which rows, which soil condition, and what the exposed trench looked like. If a wheel is damaged or a bearing drags, note that separately from the field result. Clear information makes a fit or setup question easier to discuss.
Then decide what outcome matters most. If the recurring issue is an open trench, prioritize closure and seed contact in the conditions where it occurs. If residue enters the trench, examine residue flow and opener operation as well as the closing wheels. If performance differs by row, investigate mechanical consistency first. This focus helps avoid buying a product for a problem it cannot address.
What are common questions about closing wheels for strip till?
Are closing wheels for strip till different from those for other systems?
The principles of furrow closure and seed contact still apply, but strip till creates a particular mix of tilled soil in the row and residue outside it. Evaluate the wheel in the conditions and planter setup where it will be used rather than relying on a generic label.
Should I change closing-wheel pressure after rain?
Check field and furrow conditions first. If soil is wet, pressure that worked earlier may contribute to smearing or compaction. Make a small, documented adjustment only after inspecting the seed trench, then recheck the result in representative soil.
Can surface appearance tell me whether the seed trench is closed?
Not by itself. Carefully expose seeds at multiple points and look below the surface for an open slot, soil contact, and residue in the trench. A smooth surface can hide a problem underneath.
How many rows should I inspect?
Inspect multiple rows and more than one location, including areas with typical variation in moisture and soil texture. The right sample depends on field variability, but one row or one spot is not enough to establish a consistent pattern.
Should I compare wheels at different planting speeds?
For a wheel-to-wheel comparison, keep speed consistent so it does not become another variable. If you are investigating speed, conduct a separate test with the wheel and other settings held steady, then inspect furrows at each speed in similar field conditions.
What is the most useful next step?
Start with a walk-through of the planter and a controlled check in representative strip-till conditions. Compare closure, seed contact, residue, soil movement, and mechanical condition, changing one factor at a time. For product and fit questions, review the Farm Shop MFG product information or get in touch with your planter details and observations.
For a specific option, review the Germinator closing wheel specifications alongside your compatibility notes and field results. Treat product information as a starting point for fit and construction questions, then rely on a fair comparison in your own conditions to assess the outcome.
Contact Farm Shop MFG with your planter questions
A careful field comparison helps you choose equipment based on your soil and setup, rather than assuming one closing wheel is right for every strip-till operation.