
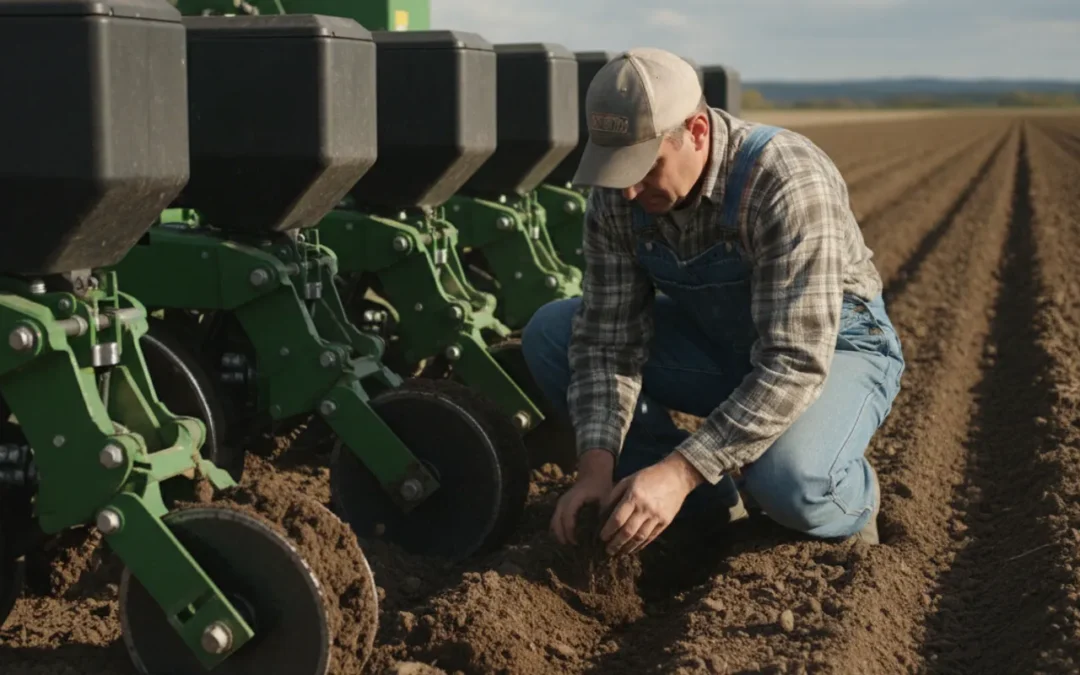
John Deere planter closing wheel adjustment starts with what the seed furrow looks like after the planter passes. A visible slot, uneven ridge, or inconsistent soil cover can point to a setup issue, but worn parts, row-unit movement, residue, or soil conditions can cause similar symptoms. Inspect first, make one change at a time, and check the result in the field before changing the rest of the planter.
Ask Farm Shop MFG about your planter setup
What should you inspect before adjusting the closing wheels?
Park and secure the planter as directed in its operator’s manual before inspecting or working near moving parts. Lower or support equipment only as the manual instructs, shut down the tractor, and keep clear of pinch points. Adjustment locations and procedures differ among John Deere models and row-unit configurations. Use the instructions for your exact planter rather than assuming one mechanism or setting applies to every machine.
Start with a visual and hands-on inspection, without forcing parts or changing settings yet. Check several row units, including one that appears to close well and one that leaves a poor result. Compare their condition and movement.
- Wheel surfaces: Look for uneven wear, cracks, chips, distortion, or material packed around the wheels. Check whether both wheels turn freely.
- Bearings and fasteners: Look for looseness, unusual play, missing hardware, or a wheel that binds. Worn or damaged components should be repaired before an adjustment is used to compensate.
- Mounting and alignment: Check that the assembly is not visibly bent, skewed, or rubbing. Verify that the wheels meet the furrow in the intended position.
- Row-unit motion: Look for a difference in free movement or apparent wear between neighboring rows. A row that moves or responds differently may have a mechanical problem.
- Residue and soil: Note residue buildup, clods, moisture, and whether the soil is firm, mellow, or prone to smearing.
If the machine has replacement parts or attachments, identify them before consulting instructions. For example, the mounting, wheel type, or adjustment range may not match the original configuration. A quick record of the planter model, row-unit details, and current parts makes it easier to verify what procedure applies. Farm Shop MFG lists standard bearings for closing wheels; confirm the correct bearing and fit for the assembly rather than selecting by appearance alone.
How can you tell whether a setting needs to change?
Make a short pass under representative conditions, then stop and inspect the furrow. Carefully uncover several seeds at multiple points. Note whether the trench is closed, whether soil surrounds the seed, and whether the seed remains at its intended depth. Do not judge the whole setup from one seed, one row, or one patch of unusually wet or dry ground.
Look at both the soil surface and the seed zone. A closed-looking surface can hide an open slot beneath it; a small surface ridge does not by itself prove that seed placement is poor. Compare a few places along the pass and across multiple rows. Record the wheel setting and field conditions so you can tell whether a later change made a difference.
- Open slot behind the row: Check wheel contact, alignment, and row-unit condition. Then consider whether the soil is too firm, dry, wet, or cloddy to close cleanly.
- Large ridge or soil pushed aside: Check for excess soil movement, alignment problems, or a setting that is too aggressive for the conditions. Confirm the correct adjustment range in the manual.
- Different results among rows: Compare hardware, wear, movement, and residue by row before making a uniform change across the planter.
- Seed exposed or poorly covered: Look for residue interference, clods, and the amount of soil moving into the furrow. Wheel pressure may not be the only cause.
- Closed surface but seed-zone gap: Open the furrow carefully and inspect the soil around the seed. Surface appearance alone is not a reliable test of seed coverage.
Record the location of each observation. If poor closure follows one row across different parts of a field, examine that row’s assembly. If several rows show the same result only in a particular soil area, conditions may be driving the pattern. This distinction helps avoid correcting sound hardware to compensate for a field-specific problem.
How should you make a careful adjustment?
Use your planter manual to identify the actual adjustment and its approved range. Do not copy a setting from another John Deere model, a different row unit, or an unrelated planter. The useful target is a consistent furrow close under the conditions you are planting in, not a particular position on a lever without regard to the field.
- Write down the baseline. Record the existing setting, planter and row-unit details, wheel condition, planting speed, soil moisture, residue, and the rows you inspected.
- Choose the relevant adjustment. If the wheels are worn, loose, or misaligned, repair the mechanical issue first. If hardware is sound and the test shows a consistent closure problem, select the adjustment the manual identifies for that symptom.
- Change one variable. Make a small, permitted change on a test row or in the manner the manual specifies. Avoid changing pressure, alignment, and other components at once; otherwise you will not know what affected the result.
- Repeat the same kind of pass. Use similar soil, residue, speed, and planting conditions. A different field patch makes the comparison less useful.
- Dig and compare. Check multiple seeds and rows for closure, depth, and soil around the seed. Keep the adjustment only if the repeated result improves without creating another problem.
- Document the outcome. Record what changed and where. If the result worsens, return to the prior safe setting if the manual permits, then reassess the cause.
Do not respond to a disappointing test with a large, unrecorded change. That makes it difficult to identify the useful range and can create extra soil movement or uneven results. When only one row differs, correct that row’s condition or adjustment as appropriate instead of assuming every row needs the same change.
What do soil and residue conditions tell you?
Closing wheels work with the soil that the opener leaves behind. Moist, plastic soil may smear rather than crumble. Firm or dry soil may resist movement. Clods can leave gaps, and residue can interfere with soil moving back into the furrow. Any of these can resemble a wheel-setting problem, so inspect the trench before deciding what to change.
A shiny or smeared sidewall is a reason to examine whether soil is too wet for a clean close. An open trench in hard ground may call for a different response from an open trench in loose, dry soil. If conditions are not suitable, adjustment may not solve the underlying issue. Consider the field conditions and the operator’s agronomic and equipment guidance before proceeding.
After a rainfall or a shift in moisture, recheck rather than assuming yesterday’s setting still produces the same result. For more context on how conditions affect closure, see Farm Shop MFG’s guides to closing wheels for corn, closing wheels for strip till, and sidewall compaction around the planter furrow. USDA’s Natural Resources Conservation Service provides soil and conservation resources through its official website; use those resources for broader soil-management context, not as model-specific planter adjustment instructions.
How do common closing wheel situations compare?
Use this table to sort out the next step. It is a diagnostic starting point, not a claim that one wheel design performs best in every soil or on every planter.
| Situation | What it may indicate | Useful next check |
|---|---|---|
| Existing wheels are sound and closure is consistent | The current setup may be working adequately in the conditions tested. | Check seed depth and soil around the seed in more than one location. |
| One row leaves a different furrow | Wear, looseness, binding, alignment, or row-unit movement may differ. | Compare that assembly with a well-performing row before changing settings. |
| Several rows leave open slots in firm soil | Soil resistance or a common setup issue may be involved. | Inspect soil condition, wheel contact, and manual-approved settings. |
| Soil smears or forms a hard ridge | Moisture or excessive soil movement may be contributing. | Inspect the sidewall and seed zone; reassess conditions before another adjustment. |
| Wheels or bearings are worn or damaged | An adjustment cannot restore faulty hardware. | Identify compatible replacement parts, repair, and then retest. |
| Considering an alternate wheel design | Fit, row-unit details, maintenance, and field performance all matter. | Verify compatibility and conduct a consistent field comparison. |
Use the same inspection method after repair or replacement as before it. Otherwise, you will not know whether the change improved closure or whether conditions simply changed. If you need to identify the current configuration, Farm Shop MFG’s furrow ruler information and equipment resources may help with the evaluation process; follow the directions provided for any tool or product you use.
When is replacement or an upgrade worth considering?
Start with the problem, not with a product choice. Replacement is worth investigating if the wheels are worn or damaged, if sound parts still produce inconsistent closure across representative conditions, or if maintenance concerns are recurring. First rule out loose mounting, bearing trouble, row-unit differences, residue buildup, and unsuitable soil conditions. Changing wheels without identifying the cause can leave the original issue untouched.
For an older John Deere planter, age alone does not establish whether a wheel will fit. Record the model and year, row-unit type, existing wheel arrangement, and any adapters or modifications. Compare the actual mounting and required hardware with the product specifications. Confirm fit for the exact configuration before ordering; do not infer compatibility solely from the Deere name or a photograph.
Farm Shop MFG provides information about its Germinator closing wheels and the broader Germinator product line. Review the specifications and check the details with the manufacturer before choosing a configuration. The company describes Germinator closing wheels as made from 50-grade steel; evaluate that specification alongside fit, upkeep, and your own field needs rather than treating a material description as proof of a particular field result.
It may also help to compare the current setup with the product options listed on Farm Shop MFG’s product page and its closing wheel category. Ask what hardware is included, how the assembly attaches, what routine inspection it needs, and what details determine compatibility. If one of the listed options is a model-specific assembly, such as the Germinator N6 wheel, confirm that it suits your exact row unit before relying on the name or listing.
How can you run a fair field comparison?
A field comparison is most useful when the test differs in one meaningful way. Comparing two wheel designs in separate fields with different moisture, residue, or soil structure may tell you little about the wheels. A small, documented comparison can help you decide whether to adjust, repair, or investigate an upgrade.
- Select representative ground. Avoid using only a headland, low spot, or unusually dry strip. Choose an area that reflects the conditions where the planter needs to work.
- Identify the test rows. Record which rows have the existing setup and which have a different setting or wheel configuration. Keep the other practical conditions as similar as possible.
- Hold the operating conditions steady. Use the same seed, target depth, speed, and field area where practical. Record any difference you cannot keep constant.
- Inspect repeated samples. Dig at several points per row. Compare surface closure, sidewall condition, seed depth, soil around the seed, and visible residue interference.
- Repeat in another representative area. A second check helps distinguish a repeatable pattern from an isolated patch.
- Write down the conclusion and limits. Note which setup looked more consistent and under what conditions. Do not treat one short pass as proof that the result will be identical in every field.
For instance, suppose one row leaves a narrow slot while neighboring rows close adequately. If inspection finds a loose mount or a wheel that does not turn freely, repair that issue first and retest. If every row leaves a similar slot in a firm section but closes in mellow soil, compare the field conditions and the approved setup before making a broad adjustment. These cases call for different follow-up actions even though both may first appear as “poor closure.”
How can you keep adjustment notes useful?
A short record turns a field check into information you can use on the next pass. Keep the notes simple enough to make while planting is underway. Include the date, field or area, planter and row-unit details, the setting before and after the test, and a brief description of the furrow. Add soil moisture and residue observations, since those can explain why the same assembly behaves differently from one area to another.
Use a repeatable sample method. For example, inspect the same number of locations on each test row and note whether the trench is open, closed, smeared, or ridged. At each location, check seed depth and whether soil is in contact around the seed. If a row differs, write down which row and where in the pass you saw it. A note such as “row 4, open slot in firm section, neighboring rows closed” is more useful than “planter needs more pressure.” The first describes an observation; the second assumes a cause that still needs to be checked.
Separate observations from decisions. Your record might have four lines: Observed: the furrow stayed open in a firm patch; checked: the wheel turns freely and the mounting is secure; changed: one manual-approved adjustment on the test row; result: closure improved at the sampled points without a new ridge. If the result was mixed, record that too. Mixed results can mean the test area was not consistent, conditions changed during the pass, or a second cause remains.
Keep the previous setting and the reason for each change. That gives you a reference if the next pass is worse, and makes it easier to compare checks on a later day. Avoid relying on memory when several rows, fields, or conditions are involved. A compact log does not replace the operator’s manual or an agronomic judgment; it helps you make the next inspection more specific.
What should you prepare before asking about a fit?
Before contacting a supplier, gather the information that narrows the compatibility question. Having the details ready can prevent a discussion from stopping at the planter brand when the row-unit configuration is what determines fit.
- Planter model and year, if known.
- Row-unit type and any nonstandard equipment or modifications.
- Current wheel design, mounting arrangement, and visible hardware details.
- What the furrow looks like, including whether the issue affects one row or many.
- Conditions during the check: soil moisture, residue, and whether the ground was firm or mellow.
- What has already been adjusted, repaired, or replaced.
Photos of the assembly can support the discussion, but they do not replace a fit confirmation. Ask whether the exact wheel configuration fits your row unit, whether additional brackets or hardware are needed, what inspection it requires, and how to evaluate it after installation. If the question is about changing a setting rather than choosing parts, consult the planter manual for the right procedure.
What is the most useful next step?
Inspect the assembly, record the existing setting, and dig behind a short pass before changing anything. Use the manual for your specific John Deere model, correct mechanical problems before adjusting, and compare results under similar field conditions. If you are weighing different closing wheels, confirm row-unit compatibility and judge the options by a careful field check.
Share your planter and row-unit details with Farm Shop MFG
A measured check gives you a clearer basis for deciding whether the next step is adjustment, repair, a change in field approach, or a verified replacement.