
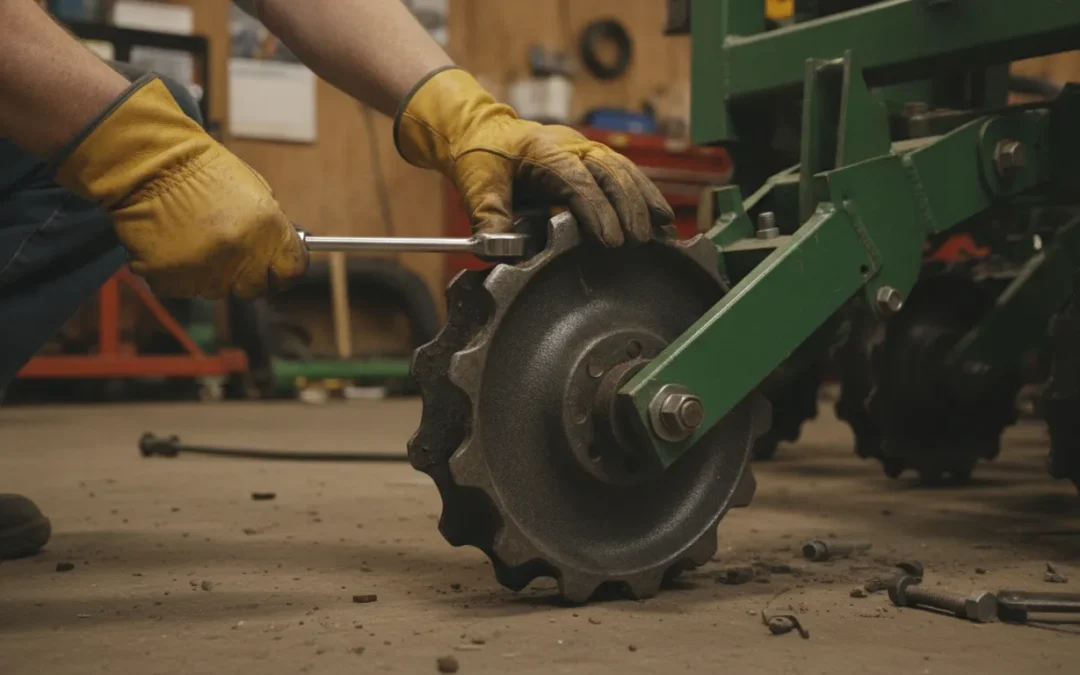
Sloppy closing wheels leave open seed trenches that dry out your crop before it can emerge. Taking the time to swap out weak plastic wheels for premium steel ones prevents this costly planting error.
Learning how to install closing wheels planter upgrades, specifically Germinator closing wheels, is a simple task taking about twenty minutes per row. This is a straightforward shop task that you can finish quickly during winter maintenance to avoid any costly planting breakdowns in the spring. The install process involves unbolting your worn factory parts, checking your row unit tailpiece alignment, and mounting the new steel wheels with standard hardware. Research from the University of Vermont Extension shows that spiked closing wheels crumble the seed trench sidewall to prevent soil compaction. By completing this quick shop upgrade, you ensure proper seed-to-soil contact across all rows, protecting your planting investment and setting up better crop yields.
Getting your planter ready for the field starts with having the right tools on your workbench. To help you get started, we have put together a complete guide to prep, align, and mount your new wheels. The first step is gathering the Tools You Need to Install Closing Wheels on Your Planter.
How to Install Closing Wheels on Your Planter: Tools You Need
Putting new closing wheels on your planter is a quick job you can do in your own shop. You do not need a lot of complex tools or heavy machines. In fact, Germinator wheels are designed so you can easily install Germinator closing wheels in your own shop. Knowing how to install closing wheels on your planter sets you up for a smooth season without high shop fees.
Common hand tools for the job
To swap out your old wheels, you will need a few standard wrenches and sockets. Most row units use simple bolts that are easy to reach. Grab these basic tools before you start work in your shop:
- An impact wrench: A standard air or cordless impact gun makes the work fast. You will need a 15/16-inch socket to fit the main hub bolt on most models.
- An end wrench: Keep a standard end wrench handy to hold the nut on the back of the tailpiece while you spin the bolt.
- A large socket: You may need a 1-1/4 inch or 1-1/2 inch socket based on your planter model.
- A tape measure: You will use this to check the gap between the two wheels once they are on the tailpiece.
Safety equipment and prep
Working around heavy row units can be tough on your hands and eyes. Always wear thick work gloves to protect your skin from sharp metal edges. Wear safety glasses to block dirt or rust when you break tight bolts loose under the tailpiece.
As you take off the old parts, look at the bolts and washers. If the hardware is still in good shape, you can save it for the new setup. But if your old bolts are worn or bent, you should buy fresh grade 5 or grade 8 bolts. Some kits come with new bolts, but keeping your old hardware is a smart backup plan.
Planter closing wheel cost
Buying a new closing system does not have to break the bank. Precision Planting systems can cost up to $1,208 per row. In contrast, you can buy Germinator wheels for about $212 per row. This closing wheel upgrade gives you the same great field results while saving you a bundle of cash.
Choosing steel over plastic or rubber is a smart move for tough soils. Spiked steel wheels crumble the soil wall to stop sidewall compaction in the seed trench. Roots grow fast in loose soil. Getting the right wheels and installing them with basic hand tools will improve your yields from day one.
Step-by-Step: Removing Your Old Closing Wheels
Many grain farmers swap their stock closing wheels because factory plastic parts wear down. Over time, these stock wheels lose their shape and fail to close the seed trench. Before you can learn how to install closing wheels on a planter, you must clean off this old gear. Taking off the old parts takes only a few tools and some prep time.
Planter safety and down pressure
Safety comes first when you work in the shop. You must lock out the planter to keep it from moving or falling. Next, release all down pressure and spring tension on the tailpiece. If you leave the springs tight, they can snap and hurt you. Take your time to bleed the air or hydraulic lines before you grab a wrench.
Step-by-step old hardware removal
Every planter model is different, so your new parts must match your own brand. You can check the compatibility with your planter before you buy any new parts. Some setups may even need a tailpiece kit to make the wheels fit right. According to a closing wheel factsheet from the University of Vermont Extension, tailpiece designs vary a lot across different lines. Once you have the right parts, you can begin the work.
- Clean the tailpiece with a wire brush. Scraping away caked mud and rust makes it much easier to turn the bolts.
- Hold the old wheel steady with one hand. Use your impact wrench to loosen the main bolt on the mounting arm.
- Slide the mounting bolt and old nut out of the hub. Keep the factory washers in a small tray so you do not lose them.
- Pull the old plastic wheel and its hub off the arm. Some setups might need a light tap with a hammer to break them free.
- Check the metal tailpiece and spindle for any deep wear or cracks. Wipe the spindle shaft clean with a dry rag to prep it for the new wheel.
Once you clear the old parts from both sides of the row, you are ready for the fun part. Make sure the bare spindle shafts have no burs or rough spots. Cleaning these metal parts now ensures that your new closing wheels will slide on smoothly and run true in the field.
Step-by-Step: Installing the Germinator Closing Wheels
You do not need a lot of time or special tools to change your planter tailpiece. We design our Germinator Closing Wheels for a quick, easy setup in your own shop. In this guide, we show you how to install closing wheels planter units use to close the seed trench and boost your yield.
Planter model and tailpiece check
Every planter model has a unique build, so you must check your tailpiece design before you begin. You can find more details in this University of Vermont factsheet on planter tailpieces. Tailpiece conversion kits are sold in some cases if you need to change your frame to fit new parts. Ordering parts that match your brand of planter ensures the brackets line up well.
Before you start, check the mounting arms on each row unit for wear or bent frames. If the mounting arms are bent, your wheels will not track straight. Wiggle the tailpiece to check for play in the bushings. Swap out any worn or rusted parts now to save time when planting starts.
Wheel seating and alignment
Our wheel parts are made with premium 50-grade steel. This tough metal will not break or bend in hard soils. To start, take one steel wheel and slip it onto the mounting hub of the row arm. Clean and grease the bearings before you slide the wheel in place.
Make sure the wheel is seated flat against the hub. Next, check the spacing between the two wheels. Both wheels must run at the same angle to close the trench well. If they are off, you will get uneven seed depth. Use spacer washers if you need to adjust how close the wheels sit to the tailpiece.
Take a tape measure to check the gap between the wheels. They should be spaced evenly across the center line. This ensures they pinch the bottom of the seed trench rather than crushing the top of the soil. A bad gap can lead to poor seed-to-soil contact and lower your crop stand.
Installing the hardware and springs
Once your wheels are aligned, place the mounting bolts through the hubs. Thread the nuts on by hand first to prevent cross-threading. Use a standard wrench to snug the hardware. Once they are snug, check that the wheel still spins freely on the hub.
If you force the bolts with a heavy impact tool, you could crack the hub or strip the threads. Tighten each bolt to the specs in your manual. Do not over-tighten the nuts, as this can crush the bearing spacer.
Reinstall the closing spring on the down-pressure arm. This spring provides the weight needed to push the steel wheels into the soil. Set the pressure hook to the middle notch to start. Change this setting later if the field is wet. Too little force lets the wheels float on top of the trench.
Common Installation Mistakes and How to Avoid Them
Bad soil closure
Putting new parts on your tailpiece seems easy. But small mistakes during the job can ruin your crop stand. Spiked or steel wheels crumble the trench wall to stop sidewall compaction. If you do not mount them right, you will face hard soil that blocks young roots.
When you learn how to install closing wheels planter setups correctly, you avoid issues that hurt crop stands. Poor closure leaves air pockets near the seed. This dry space keeps the seed from taking in water. As a result, you get a late and uneven crop rise.
Incorrect wheel spacing
Planters need fine tuning for good no-till crops. Wrong depth or angle settings cause furrow smear and uneven stands. You also must keep the right space between your closing wheels. An ideal wheel gap is 2 to 2.5 inches from center to center.
Too wide of a gap fails to pinch the soil. Too narrow of a gap can dig up seeds. These errors prevent proper seed-to-soil contact. Take time to measure the gap on every row before you go to the field.
Neglected shop alignment
Many farmers skip the alignment check in the shop. This is a big mistake that leads to poor field results. If your tailpiece is not straight, one wheel will run right on top of the seed trench. This packs the soil too tight and hurts seed growth.
Always use a simple chalk line on the shop floor to check that your closing wheels run straight behind the disc openers. This quick check ensures that your setup works as planned.
The table below lists the most common mistakes farmers make in the shop. Use it to check your work before you plant.
| Mistake | What happens | How to fix it |
|---|---|---|
| Wrong wheel gap | Furrow stays open or seeds are dug up. | Set gap to 2 or 2.5 inches center-to-center. |
| Wrong depth and angle | Causes furrow smear and uneven stand. | Adjust tailpiece brackets to match seed depth. |
| Skipping shop alignment | Wheels run off-center and press on seeds. | Draw a line on the shop floor to check path. |
| Loose hardware | Parts wobble and wear out too fast. | Torque all bolts to spec before field work. |
Post-Installation Check: How to Verify Proper Fit
You have finished putting the new hardware on your row units. But you are not ready for the field just yet. Taking time to check the fit now prevents major issues later. Once you know how to install closing wheels planter tailpieces must be aligned. Doing a few quick checks in the shop will save you from down time when the planting window is short.
Shop alignment check
Alignment is the key check for your new wheels. If the wheels do not run straight, they will not close the seed trench. This can lead to open furrows or uneven seed depth. Experts at Iowa State University show how a simple shop alignment check keeps your planter on track. You can roll the planter over a piece of cardboard or dirt to see the path of the wheels. The track should run exactly down the center of the seed furrow. You can also check for worn bushings or loose bolts in the tailpiece while you do this.
Spring tension and down pressure
Proper down pressure is vital for good soil contact. When you change your closing wheels, the old pressure settings might not work. Spiked wheels often need less down pressure than smooth rubber wheels. If the pressure is too light, the wheels will not pinch the furrow shut. If it is too heavy, you can pack the soil too hard over the seed. Making these checks in the shop prevents poor results in the spring. Penn State Extension notes that planter maintenance tips can help you avoid major field breakdowns. Adjust the tailpiece springs to match your soil type.
Trench test in the yard
Before you pull into a field, do a quick test run in the yard. Lower the planter and roll it for a few feet to see how the wheels work. Watch how the soil crumbles as the planter moves. The furrow should close fully from the bottom up. Dig into the trench to check seed depth and soil cover. You want to see loose soil above the seed with no air pockets. Setting up your Germinator closing wheels this way ensures better seed-to-soil contact. In field trials, this proper fit has led to a documented 3 to 5 bushel per acre yield increase. If you run into any issues during setup, you can contact the farm shop for direct support.
Frequently Asked Questions
How do you install closing wheels on a planter?
Standard setup is very simple. First, you remove the old wheels and clean the metal tailpiece. Next, you bolt the new wheels in place using your existing hardware. Finally, you align the wheels so they run straight. Devices like Germinator wheels are made for a fast, farmer-friendly install that you can do in your own shop.
Do you need special tools to change planter closing wheels?
No, you do not need any special tools to swap your closing wheels. Most setups need only a standard socket set, a basic wrench, and a tape measure. You can use an impact wrench to speed up the work. This makes it a great project to complete in your shop during the off-season.
Are aftermarket closing wheels universal for all planter models?
No, closing wheels do not fit every planter. Each planter model is different, so the new wheels must match your tailpiece. Based on facts from the University of Vermont, you must order wheels built for your exact machine. Sometimes you may need to use a small adapter kit to finish the job.
How long does it take to install closing wheels per row?
On average, you can expect to spend about 10 to 15 minutes per row. A standard 12-row planter will take about two to three hours to finish. Upgrading your planter in the shop now helps you avoid breakdowns in the field.
How do you check closing wheel alignment after setup?
To check the alignment, pull your planter forward a few feet on flat ground. Look at the tire tracks to see if the wheels run centered directly over the seed trench. According to the Iowa State University Extension, checking this in the shop ensures that the furrow closes perfectly in the field.
Are You Ready to Upgrade Your Planter Setup?
Leaving worn out closing wheels on your planter can cause major delays and reduce your crop yields during the next harvest season. Waiting until spring to inspect your row units means you risk facing late parts shipments and missing the best planting days of the year. Changing your planter setup in the shop right now gives you peace of mind and ensures great seed to soil contact from day one.
Are you ready to get started? Contact the farm shop today to find the right closing wheels for your row units. Our helpful team will answer all your questions and make sure your planter is fully ready for a good season in the field.