

To learn how to prevent grain spoilage on farm storage, start with the two conditions that drive deterioration: grain moisture and grain temperature. Keep both within a safe range, move air when conditions help, and find hot spots before mold or insects spread. Farm Shop MFG’s grain bin temperature monitoring guide explains the monitoring side of that job. This guide turns those principles into a practical storage routine.
Talk with Farm Shop MFG about protecting your stored grain.
How to Prevent Grain Spoilage in On Farm Storage: The Causes
Grain spoilage begins when moisture, temperature, and airflow create conditions that allow mold, insects, or grain respiration to accelerate. Wet pockets may form during harvest, filling, cooling, or condensation. As biological activity increases, it creates heat, which raises the risk of more deterioration. The first goal is to interrupt that cycle early.
Moisture creates the starting point
Grain enters storage with different moisture levels from field to field, truckload to truckload, and layer to layer. A bin can appear uniform while a wetter load, fines, damaged kernels, or a poorly distributed drying front creates a higher-risk zone. Moisture can also move as air moves through the grain mass.
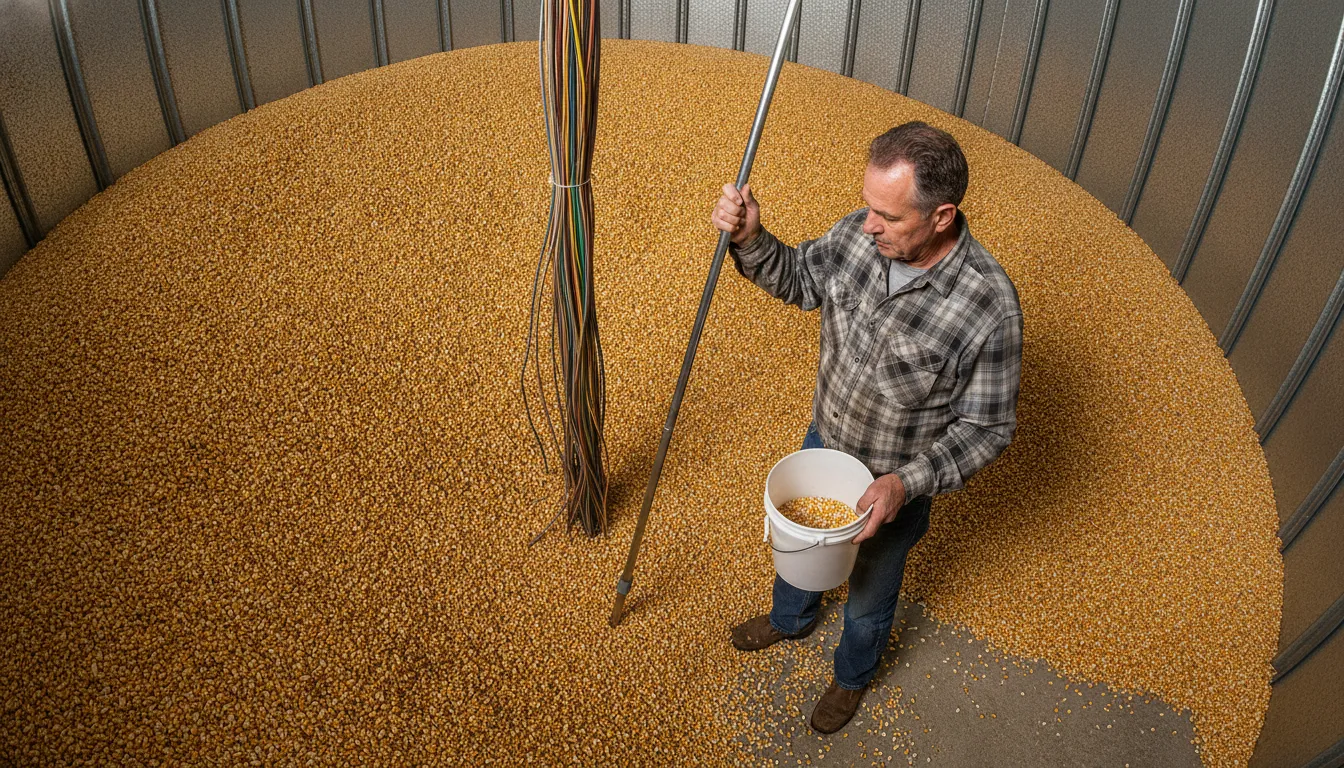
Do not treat a single moisture reading at the auger or probe as a complete picture of the bin. Use representative samples during receiving, check the moisture of each crop lot, and record where wetter grain was placed. A known wet area deserves more frequent inspection after the bin is full.
Temperature differences move moisture
Temperature differences between the grain, headspace, and outside air can create convection currents. Those currents move moisture toward cooler areas, often near the bin roof or sidewall. Condensation and caking may follow. The grain surface may look normal while a deeper pocket is warming, so surface appearance alone is not a reliable inspection method.
The USDA Agricultural Research Service study on stored-grain monitoring identifies grain moisture content and temperature as primary factors in deterioration. It also examined temperature, relative humidity, and carbon dioxide sensing as ways to identify adverse storage conditions. For a farm storage plan, that supports a simple rule: measure conditions inside the grain, not just the weather outside.
Heat can become a self-reinforcing problem
Mold and insect activity generate heat. That heat can raise the temperature of nearby grain, which can support faster biological activity. The result is a hot spot that grows while the rest of the bin still appears acceptable. A musty odor, crusting, bridging, insects, or a temperature rise is a reason to investigate, not a reason to wait for a clearer warning.
How to Prevent Grain Spoilage in On Farm Storage Before You Fill Bins
A pre-fill inspection reduces the chance that an avoidable equipment or grain-quality problem becomes a storage loss. Clean the bin, inspect airflow paths, verify measuring equipment, and make a plan for checking grain after filling. The checklist below focuses on the actions that help you establish a dry, cool, inspectable grain mass.
1. Clean the bin and remove old grain
- Remove old grain, fines, dust, and crusted material from the floor, sidewalls, transitions, and unloading equipment.
- Clean the fan, burner, ducts, screens, and transition areas so airflow is not restricted.
- Check for insect activity, rodents, roof leaks, damaged seals, and water entry points.
- Repair leaks before new grain arrives. Water entering from above can create a localized problem that monitoring only detects after damage begins.
2. Verify the aeration system
- Run each fan briefly and confirm the motor, guards, wiring, transitions, and shutters operate as expected.
- Inspect the floor and perforated ducts for blocked sections or damage.
- Confirm that the fan capacity and operating plan fit the crop, bin, depth, and expected moisture condition.
- Make sure controls can be reached safely and that someone knows when the system should run.
3. Check moisture measurement and sampling
- Verify the moisture meter with the manufacturer’s recommended check sample or procedure.
- Take representative samples instead of relying on grain from only one part of a load.
- Record crop, lot, moisture, temperature, and any visible damage or fines.
- Separate unusually wet or damaged grain when practical, rather than blending every problem into the full bin.
4. Plan the first cooling cycle
Cooling is a management decision, not simply a matter of running fans whenever the outside air feels cooler. Air temperature and relative humidity affect the moisture condition the grain approaches. The University of Minnesota’s natural-air corn drying guidance describes cool, dry conditions as favorable for natural-air drying and explains that outdoor conditions affect both drying speed and final moisture.
Write down the target condition for the crop and the forecast conditions that will trigger fan operation. If you use a thermostat, humidistat, or automatic controller, verify its sensor readings before relying on it during harvest.
5. Decide who checks the bin
Assign responsibility for routine checks before harvest pressure makes the schedule difficult. Include the person who will inspect the grain, the person who can run fans, and the person who decides when a suspected hot spot needs professional help. A written plan is useful because a quiet bin can still be changing internally.
How Do Temperature and Moisture Interact to Cause Spoilage?
Temperature and moisture interact through equilibrium moisture content, condensation, airflow, and biological activity. Air moving through grain can add or remove moisture depending on its temperature and relative humidity. Warm grain can cool unevenly, creating gradients that move moisture. The correct response depends on the crop, current readings, and the conditions available for aeration.
Equilibrium moisture matters
Equilibrium moisture content, often shortened to EMC, describes the moisture level grain tends to reach when exposed to a particular combination of air temperature and relative humidity. It is not a universal safe-moisture number for every crop or season. Use crop-specific guidance, current readings, and local extension recommendations when deciding whether aeration will condition or recondition grain.
For example, Iowa State University’s grain cooling guidance shows why temperature and crop type matter. Its examples give different safe storage moisture values for corn and soybeans at the same air temperature. That is why running a fan by the calendar alone can create unnecessary shrink or move the grain toward an undesirable moisture condition.
Cooling is not the same as drying
Cooling grain can improve storage stability, but cooling air may also change moisture. If the air is too humid for the target condition, aeration can add moisture. If the air is dry and the grain is already near its target, extended fan operation can remove more moisture than intended. The goal is controlled conditioning, not maximum fan hours.
Record fan start time, stop time, outside temperature, relative humidity if available, grain temperature, and moisture readings. That history helps you understand whether a change came from the weather, the grain, the fan, or a measurement problem.
Warm weather increases urgency
Warm grain and high moisture give mold and insects better conditions to grow. A warm spell after filling can be especially important because the bin may have not yet reached a uniform temperature. Check the temperature trend in every monitored zone, not just the average. A small but persistent increase can be more useful than one high reading that disappears after a normal cooling cycle.
How Often Should You Monitor Grain Storage?
Check stored grain on a schedule that becomes more frequent when grain is warm, moisture is uneven, weather changes quickly, or the crop will remain in storage for a long period. Manual inspection should include surface condition, odor, insects, and grain temperature. Internal sensors add a continuous view that a walk-around cannot provide.
Use a seasonal inspection rhythm
- During filling: record incoming moisture and temperature, watch for fines, and note any wetter loads or unusual odors.
- After filling: inspect the surface, core or level the grain when appropriate, and complete the first planned cooling cycle.
- During the first weeks: check more often while temperatures equalize and the drying or cooling front moves through the bin.
- During winter: review temperature trends and inspect the surface and headspace for crusting, odors, insects, or moisture.
- During spring and summer: increase attention as outdoor temperatures rise and stored grain approaches a seasonal risk period.
- Before unloading: sample the grain and look for quality changes, bridging, caking, or unusual flow.
University extension guidance on aeration recommends regular checks of the top surface and headspace when grain is held through summer. The same principle applies to any monitoring plan: the schedule should become more deliberate when the consequences of a missed change are higher.
Track trends instead of isolated numbers
A temperature reading is most useful when you can compare it with earlier readings from the same location. Mark the date, time, probe or zone, crop, and action taken. A rising trend in one area can justify checking that location manually and starting a controlled aeration response before the entire bin is affected.
Grain Temp Guard is designed for this kind of visibility. Farm Shop MFG’s system monitors grain temperature and humidity, offers visual and audio alarms, and is available in dual-temperature and humidity-temperature configurations. Review the Grain Temp Guard monitoring system to compare the configuration with your bins and inspection plan.
What Should You Do If You Find a Hot Spot?
If a hot spot appears, confirm the reading, locate the affected area, and respond before moving or unloading grain spreads the problem. Do not treat the alarm as proof of a single solution. The right action depends on the temperature rise, moisture condition, crop, bin design, airflow, and whether the grain can be safely moved or aerated.
- Confirm the change. Compare the reading with nearby zones and earlier readings. Check the sensor, wiring, and measurement method if the result is unexpected.
- Inspect safely. Look for odor, crusting, insects, condensation, caking, or visible quality changes. Never enter flowing grain and follow your farm’s confined-space procedures.
- Determine whether aeration conditions are favorable. Consider outside temperature, relative humidity, crop, moisture target, and fan capacity before starting a fan.
- Move or turn grain when appropriate. This may expose a localized problem, but it also requires a safe unloading plan and attention to where the affected grain goes.
- Recheck after the response. A lower reading at one point does not prove the entire grain mass is stable. Continue monitoring the affected zone and nearby areas.
- Escalate when the risk is beyond your equipment or training. Ask a grain storage specialist, extension professional, or qualified service provider for help with a serious heating, moisture, or structural problem.
The related guide on what causes hot spots in grain bins covers the warning signs and prevention steps in more detail. Use it alongside your own records, crop-specific storage recommendations, and safe operating procedures.
Which Tools Help Prevent Grain Spoilage?
The most effective grain storage setup combines sound grain preparation, reliable aeration, repeated inspection, and measurements from inside the bin. No sensor replaces good sampling, and no fan fixes grain that was put away too wet without a conditioning plan. The tools work together by shortening the time between a changing condition and a useful response.
| Tool or practice | What it helps you see or control | Best use |
|---|---|---|
| Representative sampling | Moisture, temperature, fines, and visible quality | Receiving grain and checking changes over time |
| Temperature cables or probes | Heat trends inside the grain mass | Finding localized warming before surface signs appear |
| Humidity and temperature monitoring | Conditions related to moisture movement | Comparing zones and supporting earlier decisions |
| Aeration fans | Cooling or conditioning when air conditions are favorable | Moving a cooling front through the bin |
| Automatic fan controls | Fan timing based on selected temperature and humidity conditions | Reducing manual timing and avoiding unproductive fan hours |
| Inspection records | Trends, response history, and recurring problem areas | Making the next decision with evidence instead of memory |
Farm Shop MFG’s EndZone automated fan control system is designed to control grain bin fans using temperature and humidity conditions. It can be paired with Grain Temp Guard so monitoring and fan control support the same moisture-management plan. Before choosing a system, confirm bin size, fan capacity, probe coverage, power, and the level of automation your operation actually needs.
Contact Farm Shop MFG to discuss a practical grain storage monitoring setup.
Frequently Asked Questions
What is the first step to prevent grain spoilage?
Start by putting clean, representative, appropriately conditioned grain into a dry bin. Then create a plan to monitor moisture and temperature, cool the grain when conditions are favorable, and inspect the bin on a schedule. Early detection gives you more options than waiting for odor, crusting, or visible mold.
Can grain spoilage be prevented by running fans continuously?
No. Continuous fan operation can waste electricity, remove too much moisture, or move grain toward an undesirable moisture condition if outdoor air is not favorable. Use crop-specific guidance and current temperature and humidity readings to decide when aeration supports the target condition.
How do you find a hot spot in a grain bin?
Compare temperature readings by zone and over time, then confirm unusual readings with a safe inspection of the surface, headspace, odor, insects, and grain condition. Temperature cables or probes can reveal internal warming that is not visible from outside the bin.
How often should stored grain be checked?
Check more often after filling, during the first cooling period, during rapid weather changes, and whenever the grain is warm or unevenly conditioned. Continue scheduled checks through winter and increase attention before and during warm spring and summer weather. A sensor trend can support, but not replace, safe manual inspection.
What is the difference between grain monitoring and fan control?
Monitoring tells you what is happening in the grain, such as a temperature or humidity change. Fan control determines when aeration equipment operates based on selected conditions. Using both can shorten response time, but the setup still needs correct probe placement, crop-specific targets, and a safe operating plan.
Grain spoilage prevention is a process, not a single product. Clean the bin, measure representative grain, manage moisture and temperature together, inspect on schedule, and respond to trends before a small problem becomes a large loss. That routine helps protect the value of the crop you worked all season to produce.