
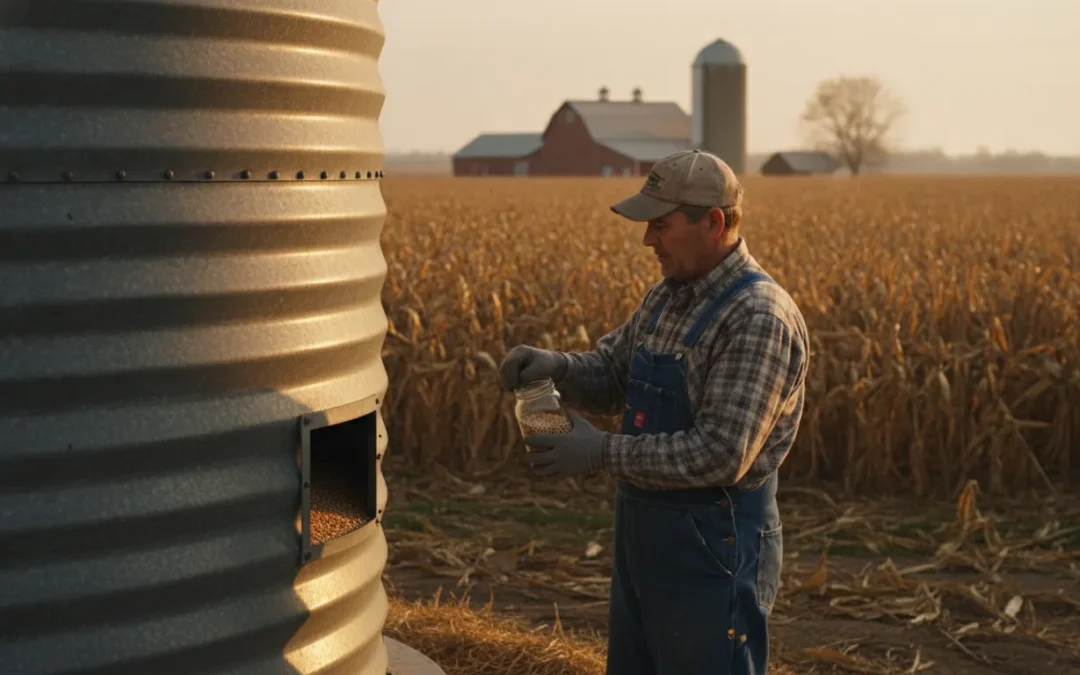
A grain bin can look fine from the outside while a small area inside is heating, collecting moisture, and starting to spoil. The first warning may be crusting, a musty smell, or grain that bridges near the surface, but waiting for those signs gives the problem time to spread.
The most common answer to what causes hot spots in grain bins is a moisture and temperature imbalance. Warm grain and colder outside air can create convection currents that move moisture, while mold and insect activity generate additional heat. Condensation near the top of the grain can then cause localized moisture reabsorption and spoilage. Temperature cables or an electronic probe help identify those changes early, so you can run aeration before the loss becomes expensive.
Understanding where a hot spot starts makes the right monitoring plan easier to build. It also explains why a few degrees of temperature change can matter long before the grain visibly breaks down. This grain bin temperature monitoring guide starts with the basic definition and the warning signs worth taking seriously.
Wondering whether hot spots are already forming in your bins? Contact the farm shop to talk through your grain storage setup and risks before the season’s problems spread.
What Is a Hot Spot in a Grain Bin?
A hot spot is a localized area inside stored grain where the temperature rises above the surrounding grain. It often develops within a few inches or feet of the top of the pile, where moisture and temperature conditions can change quickly. The rest of the bin may look normal while one pocket is already starting to spoil. Purdue Extension describes these temperature increases as hot spots and connects them with crusting, sprouting, and molding in the top layer of corn. Purdue Extension’s grain quality guidance explains the pattern in detail.
For a farmer, the warning is not simply that one area feels warm. A hot spot usually signals a problem with moisture movement, grain condition, or both. Moisture can migrate through the seed stack as air moves between kernels. When that moisture collects in one area, mold has the environment it needs to grow. Mold activity produces biological heat, which raises the local temperature further. That creates a cycle: warmer grain encourages more biological activity, and more activity creates still more heat.
Why a small warm area deserves attention
A hot spot can spread beyond its original pocket. Rising heat changes airflow through the grain, while moisture migration can feed nearby kernels. The top layer may crust over, trapping a wet or warm zone below it. If condensation forms against a cooler roof or surface, the grain can reabsorb that moisture and begin to spoil locally. By the time a musty smell, visible mold, or a hard crust is obvious, the affected area may be larger than the first warm reading suggested.
- Localized heat: one section of the grain mass is warmer than the surrounding grain.
- Moisture imbalance: moisture migration or condensation creates conditions where spoilage can start.
- Biological activity: mold growth generates additional heat and accelerates deterioration.
- Quality risk: crusting, sprouting, odors, and mold can turn a manageable pocket into a larger grain-loss problem.
That is why temperature trends matter more than a single check at the bin door. Finding a rising temperature early gives you time to investigate, manage aeration. And protect the rest of the grain before the hot spot becomes a spoiled section of the bin.
What Causes Hot Spots in Grain Bins?
Hot spots usually begin when temperature and moisture stop being evenly distributed through the grain mass. Several related processes can create that imbalance, and one problem can quickly reinforce another. Warm grain meeting cold outside air is a common starting point. The temperature difference creates convection currents inside the bin. Those currents move moisture, which can condense near cooler areas and leave pockets of grain warmer and wetter than the surrounding crop. Grains Canada explains that stronger temperature differences create stronger convection currents, increasing the risk of hot spots and condensation.
- Convection and moisture migration: Warm grain can shift heat and moisture toward colder parts of the bin, especially near the roof or outside wall. Condensation then adds moisture where it does the most damage.
- High grain moisture: Moisture imbalances create conditions for mold. Purdue Extension links top-layer crusting, sprouting, and molding with temperature increases near the top of the grain pile. Mold activity generates biological heat, making the affected area warmer and more prone to spoilage.
- Insects: Insects gather in grain areas with favorable moisture and temperature conditions. Their activity produces additional heat, while the damaged grain and insect respiration can make the local environment even more suitable for mold.
- Warm temperatures: High moisture combined with warm conditions accelerates the growth of insects, fungi, and potentially harmful mycotoxins. That is why a bin can move from a small moisture imbalance to a serious quality problem without an obvious change at the surface.
- Top-layer condensation: When warm grain meets cooler air under the bin roof, water can condense on the upper layer. The grain may crust, reabsorb moisture, and spoil in a localized area. Purdue Extension identifies condensation and moisture reabsorption as contributors to soggy surface grain.
The practical takeaway is that a hot spot is rarely just a temperature problem. It is often a moisture problem that creates mold or insect activity, followed by more heat. Aeration and grain fan automation and drying control can help manage those changing conditions, but the first step is finding temperature differences before they spread.
Q: What causes hot spots to form in stored grain?
A: Hot spots form when moisture and temperature become uneven inside stored grain. Convection currents caused by warm grain meeting cold outside air can move moisture and create condensation. High-moisture pockets then support mold and insect activity, both of which add heat. Condensation on the top layer can also cause crusting, moisture reabsorption, and localized spoilage. Together, these processes turn a small temperature or moisture difference into a concentrated area of heating.
Because the causes overlap, checking only the grain surface is not enough. Temperature readings from multiple areas can reveal a developing gradient while there is still time to run aeration and protect the rest of the bin.
How Quickly Can a Hot Spot Destroy Your Grain?
A hot spot rarely announces itself with an immediate, visible loss. It usually starts as a small temperature rise, then creates conditions that allow mold, insects, and moisture migration to accelerate. Depending on harvest moisture, grain temperature, and airflow, the timeline can be days to weeks rather than an entire storage season.
High-moisture grain has less room for error. Purdue Extension reports that unusually high harvest moisture in in-bin drying systems can reduce allowable storage time significantly more than expected. That means a bin that appears stable during the first inspection may already be moving toward a quality problem if moisture and temperature are uneven. Read more about practical ways to keep your grain from spoiling before a small problem becomes a large claim reduction.
What the first days can look like
In the early stage, a hot spot may show up as a localized temperature increase near the top of the grain pile. Warm grain and cold outside air can create convection currents, moving moisture toward cooler areas and producing condensation. The wet area may crust, sprout, or begin to mold. Biological activity then generates more heat, feeding the cycle. Purdue describes this pattern as localized spoilage associated with temperature increases and moisture reabsorption. Purdue Extension explains the storage conditions behind hot spots.
Insects also favor warm, damp pockets. Their activity adds another source of heat and can spread quality loss beyond the original area. Grain above roughly 13% to 14% moisture is especially prone to spoilage. Aeration and moisture reconditioning during the first 30 days of storage can reduce hot spots, making that early window important for newly harvested grain.
Why every two weeks matters
Grains Canada recommends checking grain temperature every two weeks and keeping stored grain below 15 degrees Celsius, or 59 degrees Fahrenheit, to reduce insect and mold risk. That interval is not a guarantee that spoilage waits for the next inspection. It is a practical minimum for catching a developing temperature trend before the damage moves through more grain. A rising reading between checks deserves action, especially after wet harvest conditions or a major outdoor temperature change.
The key is to find the trend while aeration can still correct it. Temperature cables or a reliable electronic probe can expose a gradient that surface checks miss. Early detection gives you time to run fans under appropriate conditions, investigate moisture, and protect the sound grain around the affected pocket.
How to Find Hot Spots Before They Spread
Early detection gives you options. A temperature gradient found while the grain is still in good condition can often be corrected with controlled aeration. A gradient found after grain has crusted, developed an odor, or started heating biologically may require moving grain, removing spoiled areas, or accepting a significant quality loss. The goal is to find the change while it is still a manageable temperature signal.
Use the same inspection routine throughout the storage season. The process below follows guidance from Grains Canada and adds the practical observations that help explain what the readings mean.
- Install temperature sensing cables or use an electronic probe. Permanently installed cables give you readings at multiple points and depths without requiring someone to climb into the bin or repeatedly probe the same location. If cables are not installed, use an electronic probe to check the grain mass systematically. Compare readings between areas instead of looking for one number in isolation. A rising reading or a meaningful difference between locations can reveal a temperature gradient before the surface shows obvious damage.
- Check bin temperature at least every two weeks. Put the inspection on the calendar, especially during changing weather and after filling. Record the date, location, and temperature so you can see direction over time. A single reading may not explain what is happening, but a repeated rise in one area is a warning that deserves action. Monitoring identifies temperature gradients early, allowing effective aeration before you resort to expensive or risky drying cycles.
- Sample each bin every three to four weeks. Temperature readings tell you where to investigate, but grain samples provide another view of developing problems. Sample from several areas of the bulk, not just the center or the surface. Check for changes in moisture, crusting, clumping, insects, or kernels that look different from the surrounding grain. Sampling multiple areas matters because hot spots and moisture migration are often localized rather than evenly distributed.
- Use your nose as an early warning tool. When inspecting the bin, sniff samples and the air near access points for musty or sour odors. Those smells can signal mold growth, fermentation, or other quality changes that should not be dismissed. If an odor appears alongside a rising temperature, isolate the affected area and evaluate aeration or unloading options promptly. A routine built around grain bin temperature monitoring helps turn these separate clues into a useful early-warning system.
Keep your records with the bin’s moisture and aeration history. That context helps you distinguish a temporary weather-related fluctuation from a developing storage problem, and it gives you a clearer basis for deciding when to run fans.
How Temperature Monitoring Prevents Hot Spot Losses
Manual checks can confirm a problem, but they are less reliable at showing where a temperature change is starting or how quickly it is spreading. Permanent monitoring helps you act while aeration can still protect the grain, rather than after crusting, odor, or spoilage appears.
Oklahoma State University identifies aeration as essential for managing grain temperature and preventing hot spots and moisture migration. The practical question is whether you have enough information to run fans at the right time.
| Storage decision | Manual poking, cable checks, and humidity checks | Permanent grain temperature monitoring |
|---|---|---|
| Detection frequency | Depends on someone remembering to inspect the bin, probe several areas, and interpret the readings. | Provides repeatable readings from installed sensing points, making temperature changes easier to spot between inspections. |
| Temperature visibility | A probe may sample one location and miss a developing gradient elsewhere in the grain mass. | Shows temperature patterns across monitored areas, helping identify a rising zone before it becomes obvious at the surface. |
| Moisture warning | Humidity or surface checks can confirm conditions after moisture migration or condensation has already occurred. | Temperature changes can point to moisture movement early, giving you a reason to investigate and aerate before quality declines. |
| Labor | Requires repeated climbing, probing, recordkeeping, and judgment during busy harvest and winter periods. | Reduces routine guesswork and lets the operator focus hands-on checks where the readings show a reason to look closer. |
| Cost and ROI | Appears inexpensive, but a missed hot spot or unnecessary drying cycle can erase that advantage. | Grain Temp Guard costs $499 as a standalone system with no subscription. Earlier decisions can help avoid avoidable drying and spoilage losses. |
| Risk of missed hot spots | Higher when the hot spot forms away from the probe, between checks, or under a crusted top layer. | Lower because ongoing temperature information can reveal localized changes sooner, when corrective aeration is more useful. |
The economics matter beyond the equipment price. Farm Shop MFG notes that overdrying 1,000 bushels by three points can cost more than $40 through added fuel and reduced sale weight. Monitoring does not eliminate the need to understand grain condition, but it can help you avoid treating every uncertain reading with an expensive drying cycle.
Moisture targets also depend on how long the corn will be stored: about 15% for less than six months. 14% for six to 12 months, and 13% for more than 12 months. Grain Temp Guard provides the temperature information, while EndZone can automate fan control based on conditions. Review the available grain bin temperature and humidity sensors to compare a more proactive approach with manual checks alone.
Do not wait for a musty smell or a crusted top layer. Contact the farm shop for straight answers about grain temperature monitoring and hot spot prevention.
Frequently Asked Questions
What causes hot spots to form in stored grain?
Moisture migration, condensation, mold growth, and insect activity are the main causes. Temperature differences can move moisture toward cooler areas, while mold and insects create additional heat as they grow. Purdue Extension notes that hot spots often develop near the top of the grain pile, where crusting, sprouting, and moisture reabsorption can begin. Purdue Extension explains the storage risks.
How do you detect hot spots in a grain bin?
Use temperature-sensing cables or an electronic probe to check for temperature gradients across the bin. Walk the grain surface when safe and watch for musty or sour odors, crusting, or visible moisture. Regular monitoring can identify a developing problem before the affected area spreads. Grains Canada recommends checking stored grain temperature at least every two weeks: see its grain-monitoring guidance.
Why is moisture migration a major issue in grain bins?
Warm grain and cooler outside air can create convection currents that move moisture through the grain mass. That moisture may condense in cooler areas, raising local moisture content and encouraging mold, crusting, and spoilage. The larger the temperature difference, the stronger the moisture movement can become.
What is the role of aeration in preventing hot spots?
Aeration helps bring the grain mass closer to a uniform temperature and limits the temperature differences that drive moisture migration. Run fans under suitable conditions for the grain and weather, then continue checking temperatures because aeration does not replace monitoring. Oklahoma State University identifies aeration as essential for managing grain temperature and preventing hot spots: review its fan-management guidance.
Contact us about grain bin temperature monitoring
Hot spots are easier to manage when you can see temperature changes before spoilage spreads through the bin. For practical guidance on monitoring your grain and preventing avoidable losses, contact the farm shop and talk through your setup with someone who understands the problem. Get straight answers about grain bin temperature monitoring and hot spot prevention.
A grain bin can look fine from the outside while a small area inside is heating, collecting moisture, and starting to spoil. The first warning may be crusting, a musty smell, or grain that bridges near the surface, but waiting for those signs gives the problem time to spread.
The most common answer to what causes hot spots in grain bins is a moisture and temperature imbalance. Warm grain and colder outside air can create convection currents that move moisture, while mold and insect activity generate additional heat. Condensation near the top of the grain can then cause localized moisture reabsorption and spoilage. Temperature cables or an electronic probe help identify those changes early, so you can run aeration before the loss becomes expensive.
Understanding where a hot spot starts makes the right monitoring plan easier to build. It also explains why a few degrees of temperature change can matter long before the grain visibly breaks down. This grain bin temperature monitoring guide starts with the basic definition and the warning signs worth taking seriously.
Wondering whether hot spots are already forming in your bins? Contact the farm shop to talk through your grain storage setup and risks before the season’s problems spread.
What Is a Hot Spot in a Grain Bin?
A hot spot is a localized area inside stored grain where the temperature rises above the surrounding grain. It often develops within a few inches or feet of the top of the pile, where moisture and temperature conditions can change quickly. The rest of the bin may look normal while one pocket is already starting to spoil. Purdue Extension describes these temperature increases as hot spots and connects them with crusting, sprouting, and molding in the top layer of corn. Purdue Extension’s grain quality guidance explains the pattern in detail.
For a farmer, the warning is not simply that one area feels warm. A hot spot usually signals a problem with moisture movement, grain condition, or both. Moisture can migrate through the seed stack as air moves between kernels. When that moisture collects in one area, mold has the environment it needs to grow. Mold activity produces biological heat, which raises the local temperature further. That creates a cycle: warmer grain encourages more biological activity, and more activity creates still more heat.
Why a small warm area deserves attention
A hot spot can spread beyond its original pocket. Rising heat changes airflow through the grain, while moisture migration can feed nearby kernels. The top layer may crust over, trapping a wet or warm zone below it. If condensation forms against a cooler roof or surface, the grain can reabsorb that moisture and begin to spoil locally. By the time a musty smell, visible mold, or a hard crust is obvious, the affected area may be larger than the first warm reading suggested.
- Localized heat: one section of the grain mass is warmer than the surrounding grain.
- Moisture imbalance: moisture migration or condensation creates conditions where spoilage can start.
- Biological activity: mold growth generates additional heat and accelerates deterioration.
- Quality risk: crusting, sprouting, odors, and mold can turn a manageable pocket into a larger grain-loss problem.
That is why temperature trends matter more than a single check at the bin door. Finding a rising temperature early gives you time to investigate, manage aeration. And protect the rest of the grain before the hot spot becomes a spoiled section of the bin.
What Causes Hot Spots in Grain Bins?
Hot spots usually begin when temperature and moisture stop being evenly distributed through the grain mass. Several related processes can create that imbalance, and one problem can quickly reinforce another. Warm grain meeting cold outside air is a common starting point. The temperature difference creates convection currents inside the bin. Those currents move moisture, which can condense near cooler areas and leave pockets of grain warmer and wetter than the surrounding crop. Grains Canada explains that stronger temperature differences create stronger convection currents, increasing the risk of hot spots and condensation.
- Convection and moisture migration: Warm grain can shift heat and moisture toward colder parts of the bin, especially near the roof or outside wall. Condensation then adds moisture where it does the most damage.
- High grain moisture: Moisture imbalances create conditions for mold. Purdue Extension links top-layer crusting, sprouting, and molding with temperature increases near the top of the grain pile. Mold activity generates biological heat, making the affected area warmer and more prone to spoilage.
- Insects: Insects gather in grain areas with favorable moisture and temperature conditions. Their activity produces additional heat, while the damaged grain and insect respiration can make the local environment even more suitable for mold.
- Warm temperatures: High moisture combined with warm conditions accelerates the growth of insects, fungi, and potentially harmful mycotoxins. That is why a bin can move from a small moisture imbalance to a serious quality problem without an obvious change at the surface.
- Top-layer condensation: When warm grain meets cooler air under the bin roof, water can condense on the upper layer. The grain may crust, reabsorb moisture, and spoil in a localized area. Purdue Extension identifies condensation and moisture reabsorption as contributors to soggy surface grain.
The practical takeaway is that a hot spot is rarely just a temperature problem. It is often a moisture problem that creates mold or insect activity, followed by more heat. Aeration and grain fan automation and drying control can help manage those changing conditions, but the first step is finding temperature differences before they spread.
Q: What causes hot spots to form in stored grain?
A: Hot spots form when moisture and temperature become uneven inside stored grain. Convection currents caused by warm grain meeting cold outside air can move moisture and create condensation. High-moisture pockets then support mold and insect activity, both of which add heat. Condensation on the top layer can also cause crusting, moisture reabsorption, and localized spoilage. Together, these processes turn a small temperature or moisture difference into a concentrated area of heating.
Because the causes overlap, checking only the grain surface is not enough. Temperature readings from multiple areas can reveal a developing gradient while there is still time to run aeration and protect the rest of the bin. The wheat storage temperature monitoring guide applies these warning signs to wheat-specific targets.
How Quickly Can a Hot Spot Destroy Your Grain?
A hot spot rarely announces itself with an immediate, visible loss. It usually starts as a small temperature rise, then creates conditions that allow mold, insects, and moisture migration to accelerate. Depending on harvest moisture, grain temperature, and airflow, the timeline can be days to weeks rather than an entire storage season.
High-moisture grain has less room for error. Purdue Extension reports that unusually high harvest moisture in in-bin drying systems can reduce allowable storage time significantly more than expected. That means a bin that appears stable during the first inspection may already be moving toward a quality problem if moisture and temperature are uneven. Read more about practical ways to keep your grain from spoiling before a small problem becomes a large claim reduction.
What the first days can look like
In the early stage, a hot spot may show up as a localized temperature increase near the top of the grain pile. Warm grain and cold outside air can create convection currents, moving moisture toward cooler areas and producing condensation. The wet area may crust, sprout, or begin to mold. Biological activity then generates more heat, feeding the cycle. Purdue describes this pattern as localized spoilage associated with temperature increases and moisture reabsorption. Purdue Extension explains the storage conditions behind hot spots.
Insects also favor warm, damp pockets. Their activity adds another source of heat and can spread quality loss beyond the original area. Grain above roughly 13% to 14% moisture is especially prone to spoilage. Aeration and moisture reconditioning during the first 30 days of storage can reduce hot spots, making that early window important for newly harvested grain.
Why every two weeks matters
Grains Canada recommends checking grain temperature every two weeks and keeping stored grain below 15 degrees Celsius, or 59 degrees Fahrenheit, to reduce insect and mold risk. That interval is not a guarantee that spoilage waits for the next inspection. It is a practical minimum for catching a developing temperature trend before the damage moves through more grain. A rising reading between checks deserves action, especially after wet harvest conditions or a major outdoor temperature change.
The key is to find the trend while aeration can still correct it. Temperature cables or a reliable electronic probe can expose a gradient that surface checks miss. Early detection gives you time to run fans under appropriate conditions, investigate moisture, and protect the sound grain around the affected pocket.
How to Find Hot Spots Before They Spread
Early detection gives you options. A temperature gradient found while the grain is still in good condition can often be corrected with controlled aeration. A gradient found after grain has crusted, developed an odor, or started heating biologically may require moving grain, removing spoiled areas, or accepting a significant quality loss. The goal is to find the change while it is still a manageable temperature signal.
Use the same inspection routine throughout the storage season. The process below follows guidance from Grains Canada and adds the practical observations that help explain what the readings mean.
- Install temperature sensing cables or use an electronic probe. Permanently installed cables give you readings at multiple points and depths without requiring someone to climb into the bin or repeatedly probe the same location. If cables are not installed, use an electronic probe to check the grain mass systematically. Compare readings between areas instead of looking for one number in isolation. A rising reading or a meaningful difference between locations can reveal a temperature gradient before the surface shows obvious damage.
- Check bin temperature at least every two weeks. Put the inspection on the calendar, especially during changing weather and after filling. Record the date, location, and temperature so you can see direction over time. A single reading may not explain what is happening, but a repeated rise in one area is a warning that deserves action. Monitoring identifies temperature gradients early, allowing effective aeration before you resort to expensive or risky drying cycles.
- Sample each bin every three to four weeks. Temperature readings tell you where to investigate, but grain samples provide another view of developing problems. Sample from several areas of the bulk, not just the center or the surface. Check for changes in moisture, crusting, clumping, insects, or kernels that look different from the surrounding grain. Sampling multiple areas matters because hot spots and moisture migration are often localized rather than evenly distributed.
- Use your nose as an early warning tool. When inspecting the bin, sniff samples and the air near access points for musty or sour odors. Those smells can signal mold growth, fermentation, or other quality changes that should not be dismissed. If an odor appears alongside a rising temperature, isolate the affected area and evaluate aeration or unloading options promptly. A routine built around grain bin temperature monitoring helps turn these separate clues into a useful early-warning system.
Keep your records with the bin’s moisture and aeration history. That context helps you distinguish a temporary weather-related fluctuation from a developing storage problem, and it gives you a clearer basis for deciding when to run fans.
How Temperature Monitoring Prevents Hot Spot Losses
Manual checks can confirm a problem, but they are less reliable at showing where a temperature change is starting or how quickly it is spreading. Permanent monitoring helps you act while aeration can still protect the grain, rather than after crusting, odor, or spoilage appears.
Oklahoma State University identifies aeration as essential for managing grain temperature and preventing hot spots and moisture migration. The practical question is whether you have enough information to run fans at the right time.
| Storage decision | Manual poking, cable checks, and humidity checks | Permanent grain temperature monitoring |
|---|---|---|
| Detection frequency | Depends on someone remembering to inspect the bin, probe several areas, and interpret the readings. | Provides repeatable readings from installed sensing points, making temperature changes easier to spot between inspections. |
| Temperature visibility | A probe may sample one location and miss a developing gradient elsewhere in the grain mass. | Shows temperature patterns across monitored areas, helping identify a rising zone before it becomes obvious at the surface. |
| Moisture warning | Humidity or surface checks can confirm conditions after moisture migration or condensation has already occurred. | Temperature changes can point to moisture movement early, giving you a reason to investigate and aerate before quality declines. |
| Labor | Requires repeated climbing, probing, recordkeeping, and judgment during busy harvest and winter periods. | Reduces routine guesswork and lets the operator focus hands-on checks where the readings show a reason to look closer. |
| Cost and ROI | Appears inexpensive, but a missed hot spot or unnecessary drying cycle can erase that advantage. | Grain Temp Guard costs $499 as a standalone system with no subscription. Earlier decisions can help avoid avoidable drying and spoilage losses. |
| Risk of missed hot spots | Higher when the hot spot forms away from the probe, between checks, or under a crusted top layer. | Lower because ongoing temperature information can reveal localized changes sooner, when corrective aeration is more useful. |
The economics matter beyond the equipment price. Farm Shop MFG notes that overdrying 1,000 bushels by three points can cost more than $40 through added fuel and reduced sale weight. Monitoring does not eliminate the need to understand grain condition, but it can help you avoid treating every uncertain reading with an expensive drying cycle.
Moisture targets also depend on how long the corn will be stored: about 15% for less than six months. 14% for six to 12 months, and 13% for more than 12 months. Grain Temp Guard provides the temperature information, while EndZone can automate fan control based on conditions. Review the available grain bin temperature and humidity sensors to compare a more proactive approach with manual checks alone.
Do not wait for a musty smell or a crusted top layer. Contact the farm shop for straight answers about grain temperature monitoring and hot spot prevention.
Frequently Asked Questions
What causes hot spots to form in stored grain?
Moisture migration, condensation, mold growth, and insect activity are the main causes. Temperature differences can move moisture toward cooler areas, while mold and insects create additional heat as they grow. Purdue Extension notes that hot spots often develop near the top of the grain pile, where crusting, sprouting, and moisture reabsorption can begin. Purdue Extension explains the storage risks.
How do you detect hot spots in a grain bin?
Use temperature-sensing cables or an electronic probe to check for temperature gradients across the bin. Walk the grain surface when safe and watch for musty or sour odors, crusting, or visible moisture. Regular monitoring can identify a developing problem before the affected area spreads. Grains Canada recommends checking stored grain temperature at least every two weeks: see its grain-monitoring guidance.
Why is moisture migration a major issue in grain bins?
Warm grain and cooler outside air can create convection currents that move moisture through the grain mass. That moisture may condense in cooler areas, raising local moisture content and encouraging mold, crusting, and spoilage. The larger the temperature difference, the stronger the moisture movement can become.
What is the role of aeration in preventing hot spots?
Aeration helps bring the grain mass closer to a uniform temperature and limits the temperature differences that drive moisture migration. Run fans under suitable conditions for the grain and weather, then continue checking temperatures because aeration does not replace monitoring. Oklahoma State University identifies aeration as essential for managing grain temperature and preventing hot spots: review its fan-management guidance.
Contact us about grain bin temperature monitoring
Hot spots are easier to manage when you can see temperature changes before spoilage spreads through the bin. For practical guidance on monitoring your grain and preventing avoidable losses, contact the farm shop and talk through your setup with someone who understands the problem. Get straight answers about grain bin temperature monitoring and hot spot prevention.