
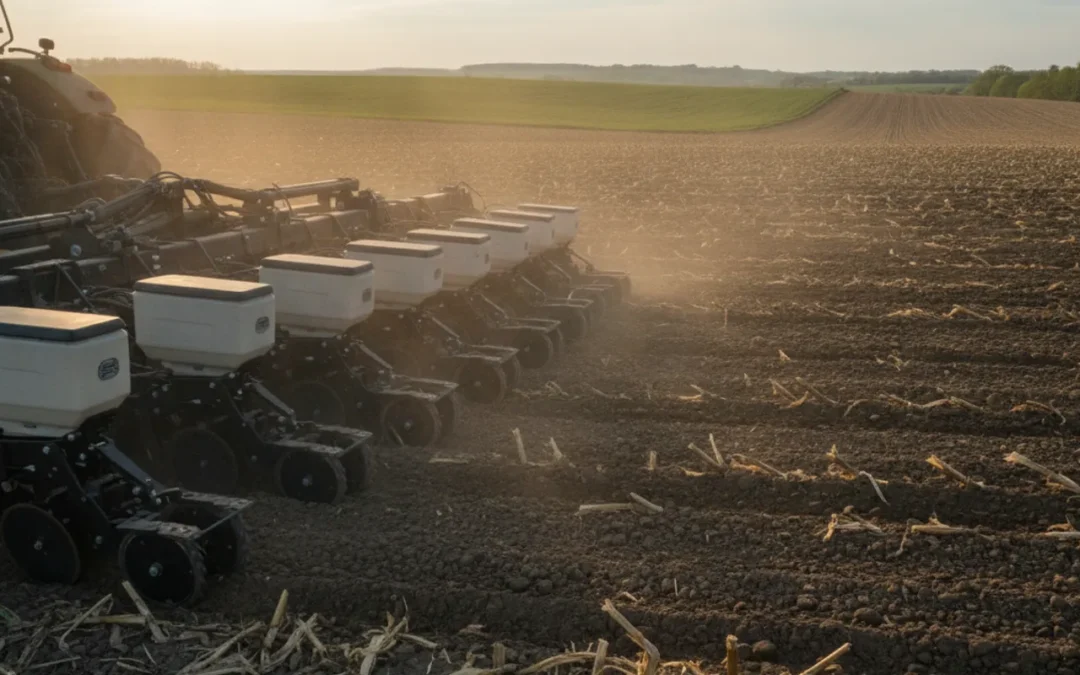
Closing wheels for sidehill planting need to do more than leave a neat-looking row: they need to close the seed trench consistently as slope, soil, residue, and travel direction change. A setup that works on level ground may behave differently across a hillside, so check what the soil is doing behind the planter rather than relying on appearance alone.
Ask about planter closing wheel options
Why can sidehill planting change closing wheel performance?
On a sidehill, gravity and the direction of travel add variables that are less noticeable on level ground. Soil can move or settle differently on the uphill and downhill sides of the row. Residue may feed unevenly into the row unit. A row unit can also respond to rough ground, changing contact with the soil. These effects vary with slope, soil texture and moisture, tillage, residue, planter design, and operating speed.
That does not mean every sidehill needs a special wheel or a large change in settings. It means you should verify the result under the conditions where you will plant. A furrow that appears filled from above may still have an open seam, a compacted sidewall, or soil pushed away from the seed. Conversely, a slightly ridged surface is not automatically a problem if the trench is closed around the seed and the row unit is functioning as intended.
Start with the planter manual and the setup recommendations for your row unit. Treat the checks below as a way to diagnose field performance, not as a substitute for model-specific adjustment limits. For broader field and slope management considerations, consult local conservation guidance such as the USDA Natural Resources Conservation Service.
What should you decide before changing a setting?
First identify the outcome you need to improve. A row that looks different is an observation, not a diagnosis. Decide whether the issue is an open trench, a loose seed zone, uneven soil displacement, a sidewall that smears, residue interference, or inconsistent emergence. Different symptoms can have different causes, and changing wheel pressure or angle without identifying the symptom can create a new problem.
- Compare uphill and downhill rows. Note whether the same symptom appears on both sides of the planter, only on particular row units, or only when traveling in one direction.
- Compare slope with level ground. If the issue appears only on a sidehill, slope-related soil movement or row-unit behavior may be involved. If it occurs everywhere, check basic setup, wear, and field conditions first.
- Define what good closure looks like in your field. The seed should be placed at the intended depth, with soil closing the trench around it. Do not judge only by a smooth surface or a uniform-looking ridge.
- Write down the current setup. Record wheel type, orientation, adjustment positions, down-pressure setting if applicable, operating speed, travel direction, soil condition, and the row numbers checked.
If you are still establishing a baseline for the planter, use a systematic planter closing wheel alignment check before attributing every difference to the hillside. Alignment and worn or loose parts can affect performance on any terrain.
Which parts should you inspect before the field test?
Park safely on level ground, lower the planter according to the operator manual, and follow the manufacturer service instructions before working around moving parts. Inspect the row units you plan to compare, then look across the planter for differences. A sidehill test will not tell you much if one row has a loose pivot or a damaged wheel.
- Wheel condition: Look for cracks, uneven wear, bends, packed mud, or damage that could make the wheel contact the soil differently. Rotate each wheel by hand only when the planter is safely secured and the manual permits it.
- Bearings and free movement: Check for excessive play, binding, or rough rotation. Compare neighboring rows, and follow the service interval and replacement guidance for your equipment.
- Mounts, arms, and pivots: Look for looseness, bent parts, missing hardware, and wear at pivot points. Confirm the assembly moves as designed without unintended side play.
- Row-unit basics: Inspect opener condition, depth-setting components, gauge-wheel contact, and residue flow. A closing wheel cannot correct a trench that is being opened inconsistently or a row unit that is not following the ground properly.
- Clearance and alignment: Check that both wheels and associated parts are positioned as the planter manufacturer specifies. If the setup is adjustable, record its current position before making a change.
When a component is damaged or outside the manufacturer service limits, repair it before comparing settings. Farm Shop MFG has a guide to standard bearings for closing wheels; confirm that any part you select matches your planter and wheel assembly.
How do you prepare the field and planter for a useful test?
Choose a representative stretch with a safe, consistent slope and enough room to travel across the hill in the directions you normally plant. Do not put a test pass where turning, backing, or an unstable side slope creates a safety risk. Follow the tractor and planter operating instructions, and avoid working on ground conditions that compromise traction or control. A test is useful only if it can be made safely and repeated under comparable conditions.
Mark the test area and note what changes across it. A hillside can contain different soil textures, moisture levels, residue loads, and degrees of slope within a short distance. Prefer a section where those conditions are reasonably uniform. If you cannot find one, divide the area into distinct zones and evaluate each separately instead of treating the whole slope as one test condition.
Before planting, identify how you will compare results: a level-ground reference, a pass across the slope, or a repeat in the opposite direction when safe and practical. Keep the current settings unchanged for the baseline pass. Record row numbers from the uphill and downhill sides, travel direction, speed, and any visible difference in residue or soil. If multiple operators are involved, agree on how to identify rows and where to inspect so the comparison stays consistent.
Finally, bring a notebook or use a field record to capture each observation. Include date, field zone, soil condition, wheel setup, adjustment position, and the locations where you uncovered seed. These notes make it possible to compare a later pass or revisit the same location after planting. Without a baseline, it is easy to confuse a setting effect with a change in slope, moisture, residue, or operator technique.
How do you make a useful sidehill test pass?
Choose a representative stretch with a safe, consistent slope and enough room to travel both across and along the hill if that is part of your normal operation. Avoid testing in a patch that changes abruptly from wet to dry, heavy residue to bare soil, or one soil type to another. If you cannot avoid a change, mark it so you do not mistake the field variation for a setting effect.
- Set up a level-ground reference. Plant a short pass in a representative level area with the current setup, if available. Record travel direction, speed, soil moisture, and row-unit settings.
- Run a sidehill pass without changing settings. Keep the operating conditions as consistent as practical. Note whether you are moving across the slope, uphill, or downhill, and identify the rows on the uphill and downhill sides.
- Stop and inspect several rows. Check more than one row unit and several spots along the pass. Carefully uncover a short section of row with a hand tool. Find the seed and inspect the trench around it without pulling the seed out of position.
- Repeat in the opposite direction when safe and practical. If the symptom reverses with travel direction, that is useful evidence. If it stays with the same row units, inspect those row units more closely.
- Change one variable at a time. Make only an adjustment allowed by the manual, then repeat the same short test. Record the change and result so you can return to the original setup if it does not help.
Do not use a single exposed seed or one short stretch to declare success. Compare several locations and rows. The point is to see whether the same pattern repeats and whether a measured adjustment improves the seed-zone result without creating a problem elsewhere.
What should you look for behind the planter?
Begin with the surface, but do not stop there. A continuous slot or visible gap can flag poor closure. A ridge or displaced soil may show where soil is moving, but it is not enough to determine whether the seed trench is closed. Dig carefully in a few representative spots, including uphill-side and downhill-side rows.
Check whether the seed is at the intended depth and surrounded by soil, whether the trench has a continuous open seam, and whether soil is pressed into a dense or smeared layer. Look for residue caught in the trench or pinched under a wheel. Note if the seed has shifted from its placement position. Use the same inspection method on the reference pass and sidehill pass.
It can help to compare the planted row with a nearby unplanted strip or the soil between rows, but avoid assuming that the surface should look identical everywhere. Moisture and texture can change across a slope. The decision should be based on the seed zone and repeatable patterns, not just the color or shape of the surface.
How can you interpret common sidehill symptoms?
| What you observe | What to check first | Practical next step |
|---|---|---|
| Open trench or a visible gap on one side of the row | Whether it repeats on the same rows or changes with travel direction; wheel contact, alignment, and soil condition | Inspect row-unit condition, then test one manual-approved adjustment on a short pass |
| Uphill and downhill sides look different | Soil displacement, residue flow, row-unit movement, and seed-zone closure on both sides | Compare matched rows and directions; avoid changing all rows until the pattern is clear |
| Trench is covered, but seed is in a loose pocket | Depth consistency, soil moisture, opener action, and whether the closing assembly is moving soil into the trench | Check the full row-unit setup and inspect more than one seed before changing pressure |
| Hard or smeared sidewall | Soil moisture and opener-created trench, not only the closing wheels | Assess whether conditions are fit to plant and review the planter setup; see the sidewall compaction planter guide |
| Residue caught in or across the trench | Residue distribution, row cleaners if equipped, and clearance at the row unit | Correct residue interference according to the planter manual before evaluating wheel changes |
| Problem appears on level ground and sidehill alike | Basic alignment, wear, loose parts, and consistent row-unit operation | Return to a baseline inspection before treating slope as the cause |
Use the table to guide inspection, not to diagnose from appearance alone. Two symptoms can occur together. For example, a trench may be open because of poor soil flow, a mechanical issue, unsuitable moisture, or more than one factor at once.
How should you decide whether to adjust closing wheel pressure or position?
Make the smallest change your equipment manual allows, and only after you have identified a repeatable symptom. A change that helps on one soil type or moisture condition may not help on another. Likewise, do not assume that more pressure is always better. Excessive force can alter the soil around the seed, while too little contact may leave the trench inadequately closed; the correct range depends on the row unit, wheel assembly, field condition, and manufacturer guidance.
Use a controlled comparison: leave a set of rows at the existing setting, change one setting on a comparable set if the planter design and operating procedure allow it, and inspect both under the same conditions. If your planter does not allow a safe, meaningful comparison across rows, use consecutive short passes and keep the field conditions as similar as possible. Record the starting point, adjustment, travel direction, and result.
Do not change wheel angle, spacing, or orientation based on a generic rule from another planter. Designs differ, and the correct setting depends on the equipment instructions. If you cannot resolve the symptom, contact the planter manufacturer or a qualified service provider with the model, observed condition, photos if useful, and the adjustments already tested.
What is different when comparing wheel types?
Compare closing wheel options by the job they need to do in your soil and residue conditions, the compatibility with your row unit, and the result you can verify in a field test. A wheel material or shape alone does not establish that it will perform better on every slope. Match the option to the planter and evaluate the seed trench under the conditions that challenge your current setup.
Farm Shop MFG makes Germinator closing wheels. Before considering any wheel change, confirm fitment and review the product details for your planter. The Germinator Closing Wheels page and the specific Germinator product listing provide a starting point for that review. For a broader buying framework, see the guide to closing wheels for corn; sidehill performance still needs to be verified in your own field.
How do you verify emergence after planting?
Keep the first pass and test area marked so you can revisit it. After planting, check emergence across uphill-side, downhill-side, and level-ground rows. Compare the same row sections where possible, and note whether differences align with slope, travel direction, soil changes, or particular row units.
When emergence is uneven, do not assume the closing wheels caused it. Review seed depth, spacing, seed-to-soil contact, soil moisture, planting conditions, residue, and other row-unit functions. A closing wheel adjustment can affect trench closure, but emergence depends on more than the closing assembly. If you want to assess the rest of the planter setup, review Farm Shop MFG planter and equipment resources and the relevant equipment manual.
For a practical planting review, log field and pass, slope and travel direction, row numbers, soil condition, wheel setup, any adjustment, trench observations, and later emergence notes. These records make it easier to distinguish a repeatable setup issue from a one-time patch of different soil.
What mistakes can make a sidehill check misleading?
- Changing several settings at once. If the result improves or worsens, you will not know which change mattered.
- Judging only by the surface. A covered trench can still have a poor seed zone, and a visible ridge does not automatically mean the seed is exposed.
- Testing in different conditions. A wet pass cannot be fairly compared with a dry pass, or heavy residue with a clean strip, without accounting for the difference.
- Checking only one row. A single row may have a mechanical fault that does not represent the whole planter.
- Ignoring travel direction. Sidehill effects can appear differently across directions, so record whether the pass was uphill, downhill, or across the slope.
- Making an adjustment beyond the manual. Do not improvise settings or service procedures that could compromise safe operation or equipment fit.
What should you do before planting the full field?
Use this sequence: inspect and repair worn parts, establish a baseline, make a short sidehill pass, uncover several rows, record patterns, and test one approved adjustment at a time. Repeat the check on the slope and soil conditions that matter most to your operation. If trench closure is consistent and the seed is properly surrounded by soil, keep the setting documented and continue to monitor the field.
If the cause is not clear, ask for help with specific observations rather than only reporting that the planter does not close well. Share the planter make and model, wheel assembly, field conditions, travel direction, row numbers, photos of the surface and opened seed trench, and any changes tested. For product-fitment questions, you can contact Farm Shop MFG or review available Farm Shop MFG products.
Review Germinator closing wheel details
Make the field check repeatable
Sidehill planting calls for observation, not guesswork. Compare level and sloped passes, check the seed trench on both sides of the planter, isolate one variable at a time, and follow the row-unit manufacturer instructions. A repeatable check gives you a sound basis for deciding whether to maintain the current setup, make a measured adjustment, or investigate another cause.
Frequently asked questions
Do I need different closing wheels just because my fields have sidehills?
Not necessarily. First check whether your existing setup repeatedly leaves a problem in the seed trench under your field conditions. Confirm wear, fit, alignment, and the rest of the row-unit setup before deciding that a different wheel is needed.
Should closing wheel pressure be higher on a sidehill?
There is no one pressure setting that suits every planter, soil, or slope. Follow the manufacturer range and test a measured adjustment only when inspection shows a repeatable closure issue. Verify the seed zone rather than choosing pressure based on the surface alone.
Why does the row look different going the other direction?
Travel direction can change how the planter encounters slope, residue, and soil movement. Compare the same row units in both directions when safe and practical, then inspect whether the difference exists around the seed or only at the surface.
Can closing wheels fix sidewall compaction?
They cannot reliably correct every cause of a compacted or smeared sidewall. Soil moisture, opener action, and overall row-unit setup also matter. Inspect the trench and conditions, and use your planter manual or qualified support to determine the next step.
How many rows should I inspect?
Inspect several representative rows, including uphill-side and downhill-side rows, and repeat at multiple points along the test pass. Include a level-ground comparison when available. Repeated observations are more useful than a conclusion based on one row or one seed.