
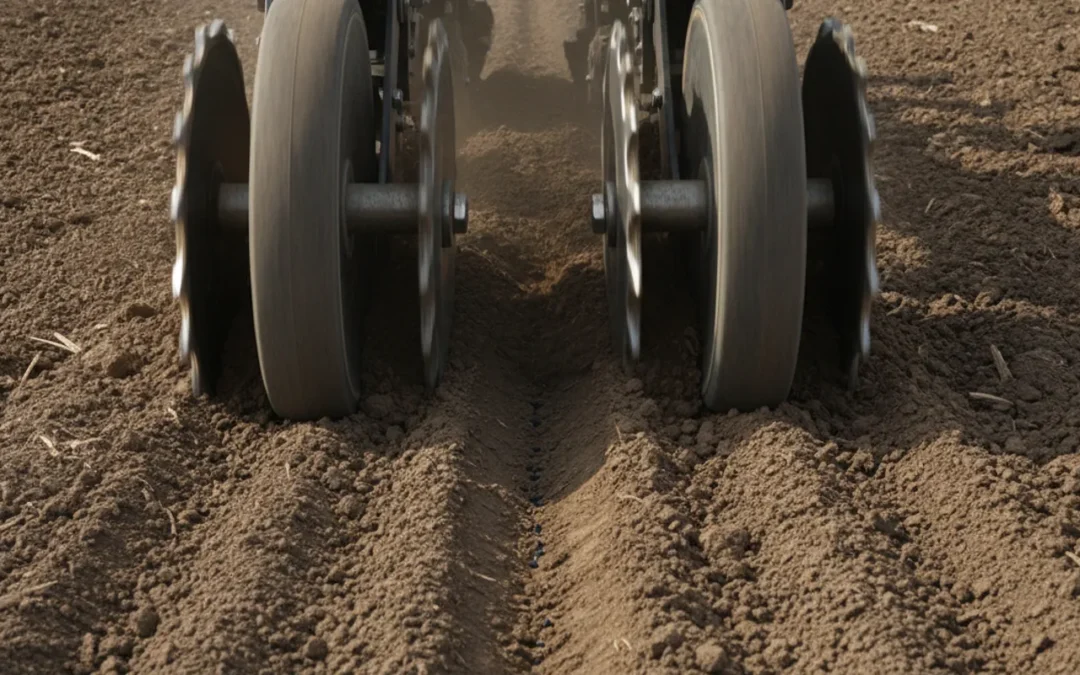
Closing wheel and gauge wheel setup should be checked as one sequence, not as two unrelated adjustments. Gauge wheels help control opener depth and soil flow beside the trench; closing wheels then press soil back around the seed. If the first part of the row unit is not tracking consistently, the closing wheels may be asked to correct a trench that was formed unevenly. A repeatable field check helps you see whether the complete row unit is making a consistent seed zone.
What does gauge wheel position have to do with closing?
The opener creates the seed trench. Gauge wheels run alongside it and help limit how deeply the opener enters the soil. They also affect how soil moves and supports the row unit near the trench. Closing wheels follow the opener and bring soil back over the seed. They need a trench with suitable shape, depth, and soil condition to do their job.
That order matters. If a gauge wheel is not running in its intended relationship to the opener, or if the two sides are not behaving alike, the trench may vary as the planter moves. A closing-wheel adjustment cannot reliably compensate for changing trench depth or sidewall condition. You could see a furrow that appears closed in one spot and remains open or packed differently a few feet later.
Think of the row unit as a chain of events: the opener makes the furrow, the gauge wheels help establish its depth and edges, the seed is placed, and the closing wheels return soil around it. The check is not simply whether the wheels touch the ground. It is whether the row unit makes a consistent trench and then closes it without leaving a visible gap, an excessive ridge, or a firm slot that interferes with emergence.
This is why a useful inspection begins with the opener and gauge wheels, even when the symptom appears behind the planter. A closer that is out of line may be the cause, but the furrow arriving at that closer may also be the problem. If you are reviewing the wheel choices themselves, the corn closing wheel guide explains factors to weigh before choosing a wheel design.
What should you check before changing a setting?
Start with the row unit in the condition you intend to plant. Confirm that the opener components, gauge wheels, closing-wheel arms, and tires are in serviceable condition. Look for packed soil, residue, wear, loose fasteners, and parts that do not rotate freely. A worn or damaged component can make an otherwise reasonable setting behave inconsistently.
- Check both sides. Compare left and right gauge wheels for contact, clearance, and obvious differences. Check that the closing wheels follow the furrow rather than tracking noticeably to one side.
- Look at the opener. Verify that it is not visibly bent, badly worn, or obstructed. A trench made by an opener in poor condition can make closing tests misleading.
- Check row-unit movement. Make sure the row unit can move as designed and that the parallel linkage is not binding. Confirm that attachments and residue do not interfere with wheel movement.
- Use the planter manual. Reference the manufacturer’s procedure for gauge-wheel contact, opener depth, closing-wheel alignment, and downforce. Designs differ, so do not assume that a setting or measurement transfers from one planter model to another.
- Record the baseline. Note the current planting depth setting, closing-wheel arrangement, downforce setting if adjustable, speed, and field condition. Change one factor at a time so you can identify what actually changed the result.
Do not begin by forcing the gauge wheels or closing wheels into a position that looks symmetrical from a distance. Their correct relationship depends on the planter design and component condition. A visual check is useful, but it does not replace the manual’s specified checks or a furrow inspection under field conditions.
If you need a simple field aid for viewing a trench, Farm Shop MFG lists a furrow ruler. For wear-related issues, inspect the relevant closing-wheel bearings as part of the overall check; a wheel that does not turn freely can create misleading signs of soil movement.
How can you check gauge wheel and closing wheel action together?
Use a short, controlled pass in the field you are preparing to plant. Soil texture, moisture, residue, tillage, and operating speed all influence what the row unit does. A shop-floor check can identify damage or obvious misalignment, but it cannot show exactly how the system performs in that seedbed.
- Prepare a representative strip. Choose an area that reflects the field condition you need to manage. Avoid making the decision from a headland, a wet patch, or a spot with unusual residue unless that is the condition you are diagnosing.
- Set the planter to the intended operating condition. Use your planned speed and normal row-unit settings. Check that the planter is level and operating according to its manual. If you change speed or other major settings after the pass, repeat the check.
- Plant far enough to stabilize the row units. Give the planter time to settle into the soil before stopping. Keep the pass long enough to observe a representative section, not just the first few feet after lowering the planter.
- Stop safely and expose several furrows. Follow safe shutdown procedures before working near the planter. Carefully uncover seed in multiple places. Avoid pulling soil through the trench in a way that changes its shape before you inspect it.
- Read the seed zone, not just the surface. Check depth and seed placement, whether the seed is in contact with soil, whether the trench edges are intact, and whether soil has returned around the seed. Look for an open slot, sidewall smearing, a hard ridge, or seed that has been displaced.
- Compare rows and locations. Inspect more than one row and more than one spot. A single furrow can reflect a stone, residue wad, or local soil variation rather than a planter-wide setup issue.
- Make one adjustment, then repeat. If the evidence points to gauge-wheel contact or opener depth, address that relationship first, following the manual. If the trench is consistent but closure is poor, assess closing-wheel alignment and pressure next. Recheck the same type of soil after each change.
For alignment, Iowa State University’s planter pre-plant checklist describes using a scribe test to check closing wheels against the furrow. That is a useful reminder to evaluate alignment relative to the trench, rather than judging the wheel position only by the frame. Follow the procedure that matches your planter and wheel assembly.
What signs tell you the two systems are working together?
A good result is consistent across the inspected rows and the representative section of the pass. The furrow should be closed around the seed, with soil placed where it can support seed-to-soil contact. The surface should not hide an open trench beneath a thin crust of loose soil. Nor should a closed-looking surface be treated as proof that the seed remained at its intended depth.
Use the following observations to separate likely causes. These are diagnostic clues, not substitutes for the planter maker’s specifications:
| Field observation | What it may indicate | What to check next |
|---|---|---|
| Seed depth varies along the row | Opener depth or gauge-wheel tracking may be inconsistent; field conditions may also be changing | Compare both gauge wheels, opener condition, row-unit movement, and depth in several locations |
| Furrow is open below a loose surface | Soil may not have returned firmly around the seed, or closing action may not be centered on the trench | Expose the seed zone; check closer alignment and soil condition before changing pressure |
| Trench is closed but a hard slot or sidewall is visible | Soil condition, opener action, or excessive force may be contributing to compaction | Check moisture and sidewall condition, then review gauge-wheel and closing-wheel settings |
| Closure differs greatly between left and right sides | Wheel alignment, wear, obstruction, or uneven component action may be involved | Compare parts and contact on both sides; check free rotation and planter alignment |
| Surface is ridged or soil is thrown unevenly | Closing wheels may be working too aggressively for the conditions or not tracking the furrow evenly | Review alignment and pressure in small steps, then repeat the field check |
| Results change between soil zones | Moisture, texture, residue, or tillage differences may be affecting performance | Sample each zone separately and avoid treating one setting as a universal fix |
The table points to possibilities, not a one-to-one diagnosis. For example, uneven closure can stem from a closer that is out of line, but it can also occur when the furrow itself differs across the pass. Verify the soil profile before making a large adjustment. A surface that looks neat is not enough; expose seed and inspect the layer around it.
How should you decide whether to adjust gauge wheels or closers first?
Use the sequence of operations to guide the order. If seed depth or trench shape is inconsistent before closure, check opener and gauge-wheel function first. Closing wheels act on the trench after it has been formed. Adjusting their pressure to hide a depth or sidewall problem can make one section appear better while creating a different problem elsewhere.
If the trench is consistent and seed placement is sound, but the soil is not being returned evenly, closer alignment and closing action become more likely places to investigate. Check that the wheels are centered on the trench and that the assembly moves freely. Use the planter maker’s instructions to make any alignment or pressure changes.
Make adjustments in a measured way. Record the starting point, change one setting, make another short pass, and uncover seed again. Keep operating speed and other conditions as stable as possible during the comparison. If multiple settings change at once, you may get a different result without knowing why.
Pressure deserves special care. More force is not automatically better closure. A field study published in Agronomy Journal reported that standard rubber closing wheels with high downforce had lower corn emergence than the low setting in the conditions studied. The result does not establish a universal setting for other soils, planters, or wheels, but it does support checking the seed zone instead of assuming that additional pressure improves every outcome. See the study on closing-wheel type and row-unit downforce.
Keep separate notes for field zones that behave differently. A setting that closes a furrow well in mellow, dry soil may not produce the same result in damp or residue-heavy conditions. Your goal is not to force every part of a variable field to look identical; it is to understand which conditions are changing and avoid using excess force to conceal them.
What common setup mistakes make the check less useful?
- Changing several settings at once. You cannot tell whether the improvement came from gauge-wheel position, closer pressure, alignment, or speed. Test one variable at a time where practical.
- Judging by appearance alone. A smooth surface may cover a poorly closed trench. Dig down and look at the seed, trench edges, and soil contact.
- Testing in the wrong place. A headland or isolated wet patch may not represent the field. Match the test strip to the conditions you are trying to solve.
- Ignoring wear and debris. A stuck wheel, worn component, or residue buildup can mimic a setup error. Inspect the hardware before making adjustments.
- Assuming both sides behave alike. Compare left and right components. Differences in wear, contact, and rotation can affect the furrow even when the settings appear matched.
- Using pressure as the first fix. Added force may hide a gap at the surface while increasing compaction risk. Check the furrow and seed zone before increasing pressure.
- Applying one setting everywhere. Soil and residue conditions vary. Recheck when field conditions change meaningfully.
If the issue persists after a careful check, consult the planter manual or your equipment dealer with your recorded observations. Note the model, row-unit configuration, soil condition, operating speed, depth, and what the exposed furrow looks like. Clear observations make it easier to distinguish a worn part from a setup mismatch.
Farm Shop MFG’s equipment resources and guide to planter sidewall compaction can help you investigate related planter and soil concerns. If you are comparing wheel assemblies, review the Germinator closing wheel information alongside the requirements for your planter, rather than treating a wheel change as a substitute for checking row-unit setup.
How can you make the check repeatable?
A short checklist keeps the evaluation practical and makes comparisons more reliable. Use the same order each time:
- Confirm the row unit and components are sound and free of obstructions.
- Check gauge-wheel and opener relationships using the planter’s specified procedure.
- Run a representative strip at the intended speed and settings.
- Inspect several rows and uncover seed at multiple points.
- Record depth, trench shape, closure, soil condition, and any visible differences between sides.
- Change one setting only, repeat the pass, and compare the same observations.
Keep a simple record by field zone and date. Include recent rainfall or soil moisture observations, residue level, tillage condition, planter speed, and the setting changed. This record is especially helpful when a planter moves between contrasting fields or when another operator needs to repeat the check.
Do not make the decision from emergence alone. Emergence reflects many factors beyond closing-wheel and gauge-wheel setup, including seed, weather, planting depth, and field conditions. At planting, the practical evidence is the consistency of the furrow, seed placement, and closure you can observe. Follow up after planting to see whether the stand is developing as expected, and revisit the setup if the field evidence points to a problem.
When should you review the wheel choice itself?
If the row unit is in good repair, gauge-wheel tracking and depth are consistent, and repeated checks still show poor closure in your normal conditions, it may be time to evaluate whether the closing-wheel design suits the operation. Consider the soil types, tillage system, residue, planting window, and the conditions in which the planter most often runs. A different design cannot correct an opener problem or eliminate every field variability, so keep diagnosis and product selection separate.
Review your planter model and compatibility requirements before ordering. Farm Shop MFG provides details on its Germinator closing wheels and other available equipment. Confirm that the option matches your row unit and intended use. For model-specific setup questions, use the manufacturer’s manual and seek help from a qualified equipment professional.
Review Germinator closing wheel details
Build the check around the whole row unit
Gauge wheels and closing wheels have different jobs, but the result depends on how those jobs connect. First confirm that the opener and gauge wheels are making a consistent trench; then judge whether the closing wheels return soil around the seed without leaving an open slot or creating an unnecessarily firm surface. Inspect more than one row, change one factor at a time, and verify every adjustment in the field. That process gives you a sound basis for deciding whether the issue is setup, wear, soil condition, or wheel selection.